
🎓 Check Out My Top 25 Udemy Courses (80-90% Discount): My Udemy Courses - Ramesh Fadatare
In this article, we will build a simple Login Form using JSP, Servlet, JDBC and MySQL database. We will use the latest version of JSP, Servlet Jakarta API, and MySQL database.
In this example, we will create an Employee Login Form and validate the employee's username and password with the database.
Development Steps
- Create an Eclipse Dynamic Web Project
- Add Dependencies
- Project Structure
- MySQL Database Setup
- Create a JavaBean -
LoginBean.java - Create a
LoginDao.java - Create a
LoginServlet.java - Create
login.jsp - Create
loginsuccess.jsp - Demo
Step 1: Create an Eclipse Dynamic Web Project
To create a new dynamic Web project in Eclipse:
- On the main menu, select
File > New > Project.... - In the upcoming wizard, choose
Web > Dynamic Web Project. - Click
Next. - Enter the project name as
login-jsp-servlet-jdbc-example. - Ensure that the target runtime is set to Apache Tomcat with the currently supported version.

Step 2: Add Dependencies
Add the latest release of the below JAR files to the lib folder:
jakarta.servlet-api-6.1.0.jarmysql-connector-java-8.0.13.jarjakarta.servlet.jsp.jstl-api-3.0.0.jar
If you are using Maven project then add the following dependencies to your pom.xml:
<project xmlns="http://maven.apache.org/POM/4.0.0" xmlns:xsi="http://www.w3.org/2001/XMLSchema-instance" xsi:schemaLocation="http://maven.apache.org/POM/4.0.0 http://maven.apache.org/maven-v4_0_0.xsd">
    <modelVersion>4.0.0</modelVersion>
    <groupId>net.javaguides.servlet.tutorial</groupId>
    <artifactId>java-servlet-tutorial</artifactId>
    <packaging>war</packaging>
    <version>0.0.1-SNAPSHOT</version>
    <name>java-servlet-tutorial Maven Webapp</name>
    <url>http://maven.apache.org</url>
    <dependencies>
        <dependency>
            <groupId>jakarta.servlet</groupId>
            <artifactId>jakarta.servlet-api</artifactId>
            <version>6.1.0</version>
            <scope>provided</scope>
        </dependency>
        <dependency>
            <groupId>jakarta.servlet.jsp.jstl</groupId>
            <artifactId>jakarta.servlet.jsp.jstl-api</artifactId>
            <version>3.0.0</version>
        </dependency>
        <dependency>
            <groupId>mysql</groupId>
            <artifactId>mysql-connector-java</artifactId>
            <version>8.0.13</version>
        </dependency>
    </dependencies>
    <build>
        <finalName>java-servlet-tutorial</finalName>
    </build>
</project>
Explanation:
- This
pom.xmlfile defines the project dependencies and build configuration. - The
jakarta.servlet-apidependency is for using the latest servlet API. - The
jakarta.servlet.jsp.jstl-apidependency is for using JSP standard tag library. - The
mysql-connector-javadependency is for connecting to the MySQL database.
Step 3: Project Structure
Here is the standard project structure for your reference:

Explanation:
- The
src/main/javadirectory contains the Java source files. - The
src/main/webappdirectory contains the web application files (JSP pages). - The
pom.xmlfile is the Maven project file.
Step 4: MySQL Database Setup
Create a database named mysql_database in MySQL and then create a login table using the following DDL script:
CREATE TABLE `login` (
  `username` varchar(45) NOT NULL,
  `password` varchar(45) DEFAULT NULL,
  PRIMARY KEY (`username`)
) ENGINE=InnoDB DEFAULT CHARSET=utf8mb4 COLLATE=utf8mb4_0900_ai_ci;
Insert a record for testing:
INSERT INTO `mysql_database`.`login` (`username`, `password`) VALUES ("Ramesh", "Ramesh");
Explanation:
- The
logintable has two columns:usernameandpassword. - The
usernamecolumn is the primary key. - An example user is inserted into the table with username "Ramesh" and password "Ramesh".
Step 5: Create a JavaBean - LoginBean.java
package net.javaguides.login.bean;

import java.io.Serializable;

public class LoginBean implements Serializable {
    private static final long serialVersionUID = 1L;
    private String username;
    private String password;

    public String getUsername() {
        return username;
    }

    public void setUsername(String username) {
        this.username = username;
    }

    public String getPassword() {
        return password;
    }

    public void setPassword(String password) {
        this.password = password;
    }
}
Explanation:
- The
LoginBeanclass is a JavaBean that represents the login data (username and password). - It implements
Serializableto allow the bean to be persisted. - It has getter and setter methods for
usernameandpassword.
Step 6: Create LoginDao.java
package net.javaguides.login.dao;

import java.sql.Connection;
import java.sql.DriverManager;
import java.sql.PreparedStatement;
import java.sql.ResultSet;
import java.sql.SQLException;

import net.javaguides.login.bean.LoginBean;

public class LoginDao {

    public boolean validate(LoginBean loginBean) throws ClassNotFoundException {
        boolean status = false;

        Class.forName("com.mysql.cj.jdbc.Driver");

        try (Connection connection = DriverManager
            .getConnection("jdbc:mysql://localhost:3306/mysql_database?useSSL=false", "root", "root");

            // Step 2:Create a statement using connection object
            PreparedStatement preparedStatement = connection
            .prepareStatement("select * from login where username = ? and password = ? ")) {
            preparedStatement.setString(1, loginBean.getUsername());
            preparedStatement.setString(2, loginBean.getPassword());

            System.out.println(preparedStatement);
            ResultSet rs = preparedStatement.executeQuery();
            status = rs.next();

        } catch (SQLException e) {
            printSQLException(e);
        }
        return status;
    }

    private void printSQLException(SQLException ex) {
        for (Throwable e: ex) {
            if (e instanceof SQLException) {
                e.printStackTrace(System.err);
                System.err.println("SQLState: " + ((SQLException) e).getSQLState());
                System.err.println("Error Code: " + ((SQLException) e).getErrorCode());
                System.err.println("Message: " + e.getMessage());
                Throwable t = ex.getCause();
                while (t != null) {
                    System.out.println("Cause: " + t);
                    t = t.getCause();
                }
            }
        }
    }
}
Explanation:
- The
LoginDaoclass handles database operations related to login. - The
validatemethod checks if the username and password exist in the database. - It uses a
PreparedStatementto prevent SQL injection. - The
printSQLExceptionmethod prints detailed SQL exceptions.
Step 7: Create LoginServlet.java
package net.javaguides.login.web;

import java.io.IOException;

import jakarta.servlet.ServletException;
import jakarta.servlet.annotation.WebServlet;
import jakarta.servlet.http.HttpServlet;
import jakarta.servlet.http.HttpServletRequest;
import jakarta.servlet.http.HttpServletResponse;
import jakarta.servlet.http.HttpSession;

import net.javaguides.login.bean.LoginBean;
import net.javaguides.login.dao.LoginDao;

@WebServlet("/login")
public class LoginServlet extends HttpServlet {
    private static final long serialVersionUID = 1L;
    private LoginDao loginDao;

    public void init() {
        loginDao = new LoginDao();
    }

    protected void doPost(HttpServletRequest request, HttpServletResponse response) throws ServletException, IOException {
        String username = request.getParameter("username");
        String password = request.getParameter("password");
        LoginBean loginBean = new LoginBean();
        loginBean.setUsername(username);
        loginBean.setPassword(password);

        try {
            if (loginDao.validate(loginBean)) {
                response.sendRedirect("loginsuccess.jsp");
            } else {
                HttpSession session = request.getSession();
                session.setAttribute("user", username);
                response.sendRedirect("login.jsp");
            }
        } catch (ClassNotFoundException e) {
            e.printStackTrace();
        }
    }
}
Explanation:
- The
LoginServlethandles login requests. - The
@WebServletannotation maps the servlet to the/loginURL. - The
doPostmethod processes login requests. - It creates a
LoginBeanwith the submitted username and password. - It uses the
LoginDaoto validate the credentials. - If validation succeeds, it redirects to
loginsuccess.jsp; otherwise, it redirects tologin.jsp.
Step 8: Create login.jsp
<%@ page language="java" contentType="text/html; charset=ISO-8859-1" pageEncoding="ISO-8859-1"%>
<!DOCTYPE html>
<html>
<head>
<meta charset="ISO-8859-1">
<title>Login Form</title>
</head>
<body>
 <div align="center">
  <h1>Employee Login Form</h1>
  <form action="<%=request.getContextPath()%>/login" method="post">
   <table style="with: 100%">
    <tr>
     <td>UserName</td>
     <td><input type="text" name="username" /></td>
    </tr>
    <tr>
     <td>Password</td>
     <td><input type="password" name="password" /></td>
    </tr>
   </table>
   <input type="submit" value="Submit" />
  </form>
 </div>
</body>
</html>
Explanation:
- This JSP file creates a simple login form.
- The form fields are
usernameandpassword. - The form's action attribute points to the
/loginURL, which maps to theLoginServlet.
Step 9: Create loginsuccess.jsp
<%@ page language="java" contentType="text/html; charset=ISO-8859-1" pageEncoding="ISO-8859-1"%>
<!DOCTYPE html>
<html>
<head>
<meta charset="ISO-8859-1">
<title>Login Success</title>
</head>
<body>
 <div align="center">
  <h1>You have logged in successfully</h1>
 </div>
</body>
</html>
Explanation:
- This JSP file displays a success message when the user logs in successfully.
Step 10: Demo
Deploy the web application in the Tomcat server. Once the application is successfully deployed, navigate to http://localhost:8080/login-jsp-servlet-jdbc-example/login.jsp to see the login form:
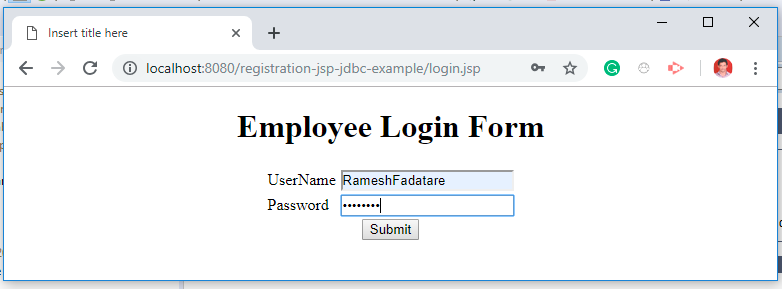
After entering the username and password, if the credentials are correct, you will be redirected to loginsuccess.jsp:

Related Servlet Posts
- What is a Servlet in Java?
- Servlet Life Cycle
- Servlet Interface Example
- GenericServlet Class Example
- HttpServlet Class Example Tutorial
- HttpServlet doGet() Method Example
- HttpServlet doPost() Method Example
- @WebServlet Annotation Example
- @WebInitParam Annotation Example
- @WebListener Annotation Example
- @WebFilter Annotation Example
- @MultipartConfig Annotation Example
- How to Return a JSON Response from a Java Servlet
- Servlet Registration Form + JDBC + MySQL Database Example
- Login Form Servlet + JDBC + MySQL Example
- Servlet JDBC Eclipse Example Tutorial
- JSP Servlet JDBC MySQL CRUD Example Tutorial
- Servlet + JSP + JDBC + MySQL Example
- Registration Form using JSP + Servlet + JDBC + Mysql Example
- Login Form using JSP + Servlet + JDBC + MySQL Example
- JSP Servlet Hibernate CRUD Example
- JSP Servlet Hibernate Web Application
- Hibernate Registration Form Example with JSP, Servlet, MySQL
- Login Form using JSP + Servlet + Hibernate + MySQL Example
My Top and Bestseller Udemy Courses. The sale is going on with a 70 - 80% discount. The discount coupon has been added to each course below:

Build REST APIs with Spring Boot 4, Spring Security 7, and JWT
![[NEW] Learn Apache Maven with IntelliJ IDEA and Java 25](https://img-c.udemycdn.com/course/750x422/6852721_b512_2.jpg "[NEW] Learn Apache Maven with IntelliJ IDEA and Java 25")
[NEW] Learn Apache Maven with IntelliJ IDEA and Java 25

ChatGPT + Generative AI + Prompt Engineering for Beginners
")
Spring 7 and Spring Boot 4 for Beginners (Includes 8 Projects)
Available in Udemy for Business

Building Real-Time REST APIs with Spring Boot - Blog App
Available in Udemy for Business

Building Microservices with Spring Boot and Spring Cloud
Available in Udemy for Business

Java Full-Stack Developer Course with Spring Boot and React JS
Available in Udemy for Business

Build 5 Spring Boot Projects with Java: Line-by-Line Coding

Testing Spring Boot Application with JUnit and Mockito
Available in Udemy for Business

Spring Boot Thymeleaf Real-Time Web Application - Blog App
Available in Udemy for Business

Master Spring Data JPA with Hibernate
Available in Udemy for Business

Spring Boot + Apache Kafka Course - The Practical Guide
Available in Udemy for Business


")

I have seen your projects,you just validate the datas that the users input their accounts right or wrong.What about if they input the datas that doesn't exist in your database?
ReplyDeleteThat you can validate based on your requirement.
DeleteBro can you create registration form and that registration name is use for login
ReplyDeleteAnd both registration and login data is stored in mysql data base
I am getting error after entering the details at employee details.
ReplyDeleteError: Type Exception Report
Message /loginsuccess.jsp (line: [4], column: [1]) Page directive must not have multiple occurrences of pageencoding
Description The server encountered an unexpected condition that prevented it from fulfilling the request.
Help me with this issue.
<%@page import="net.javaguides.login.database.*"%> - --- plz explain what is the usage this code?
ReplyDeleteHi,
ReplyDeleteI wish to change the database table in which I access the login details from.
you have it accessing the:
login table looking for "username" and "password"
I need to change it to:
users table looking for "uname" and "passwd"
Could you let me know how to do this?
Plz send this project of introduction
ReplyDeleteToday i have understand the mvc since i have started to learn java,thanks alot to you sir.
ReplyDelete