
🎓 Top 15 Udemy Courses (80-90% Discount): My Udemy Courses - Ramesh Fadatare — All my Udemy courses are real-time and project oriented courses.
▶️ Subscribe to My YouTube Channel (178K+ subscribers): Java Guides on YouTube
▶️ For AI, ChatGPT, Web, Tech, and Generative AI, subscribe to another channel: Ramesh Fadatare on YouTube
In the previous example, we have seen Hibernate Registration Form Example with JSP, Servlet, and MySQL. In this article, we will build a simple Login Form using JSP, Servlet, Hibernate Framework, and MySQL database.
What will we develop?
In this example, we will develop a User Login Form and we will validate username and password with the MySQL database using the Hibernate framework.
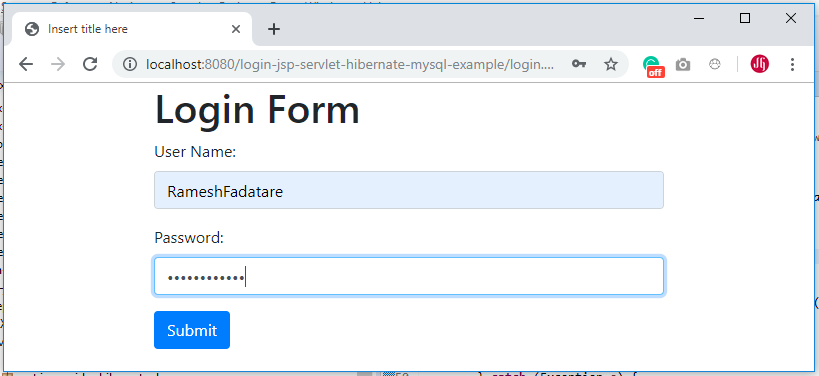
The below diagram shows our User Login Form build using JSP:
1. Create a Dynamic Web Project in Eclipse IDE
Follow the below steps to create a new dynamic Web project in Eclipse:
1. On the main menu select File > New > Project...
2. In the upcoming wizard choose Web > Dynamic Web Project.

3. Click Next.
4. Enter project name as "login-jsp-servlet-hibernate-mysql-example";5. Make sure that the target runtime is set to Apache Tomcat with the currently supported version.
2. Add Jar Dependencies - Important Step
Make sure to add all the required below Jar dependencies to project. You can get these jar dependencies from the GitHub repository.

3. Project Structure
Next, create a project structure as per the below screenshot:

4. MySQL Database Setup
Let's create a database named "demo" in MySQL:
CREATE DATABASE 'demo';
Note: Hibernate will create users tables automatically. In the previous Hibernate Registration Form Example with JSP, Servlet, and MySQL article, we have registered users so we will use the same users table to authenticate a User in this example.
5. Create a JPA Entity - User.java
Create a User class under the "model" package and add the following code to it;
package net.javaguides.hibernate.model;

import java.io.Serializable;

import javax.persistence.Column;
import javax.persistence.Entity;
import javax.persistence.GeneratedValue;
import javax.persistence.GenerationType;
import javax.persistence.Id;
import javax.persistence.Table;

@Entity
@Table(name = "users")
public class User implements Serializable {
    private static final long serialVersionUID = 1 L;

    @Id
    @GeneratedValue(strategy = GenerationType.AUTO)
    private int id;

    @Column(name = "first_name")
    private String firstName;

    @Column(name = "last_name")
    private String lastName;

    @Column(name = "user_name")
    private String username;

    @Column(name = "password")
    private String password;

    public String getFirstName() {
        return firstName;
    }
    public void setFirstName(String firstName) {
        this.firstName = firstName;
    }
    public String getLastName() {
        return lastName;
    }
    public void setLastName(String lastName) {
        this.lastName = lastName;
    }
    public String getUsername() {
        return username;
    }
    public void setUsername(String username) {
        this.username = username;
    }
    public String getPassword() {
        return password;
    }
    public void setPassword(String password) {
        this.password = password;
    }
}
Let's understand the JPA annotations used in the above User JPA entity:
@Entity - This annotation specifies that the class is an entity.
@Table - This annotation specifies the table in the database with which this entity is mapped.
@Id - This annotation specifies the primary key of the entity.
@GeneratedValue - This annotation specifies the generation strategies for the values of primary keys.
@Column - The @Column annotation is used to specify the mapping between a basic entity attribute and the database table column.
6. Create a UserDao.java
Let's create UserDao class in the "dao" package and add the following code to it:
package net.javaguides.hibernate.dao;

import org.hibernate.Session;
import org.hibernate.Transaction;

import net.javaguides.hibernate.model.User;
import net.javaguides.hibernate.util.HibernateUtil;

public class UserDao {

    public void saveUser(User user) {
        Transaction transaction = null;
        try (Session session = HibernateUtil.getSessionFactory().openSession()) {
            // start a transaction
            transaction = session.beginTransaction();
            // save the student object
            session.save(user);
            // commit transaction
            transaction.commit();
        } catch (Exception e) {
            if (transaction != null) {
                transaction.rollback();
            }
            e.printStackTrace();
        }
    }

    public boolean validate(String userName, String password) {

        Transaction transaction = null;
        User user = null;
        try (Session session = HibernateUtil.getSessionFactory().openSession()) {
            // start a transaction
            transaction = session.beginTransaction();
            // get an user object
            user = (User) session.createQuery("FROM User U WHERE U.username = :userName").setParameter("userName", userName)
                .uniqueResult();

            if (user != null && user.getPassword().equals(password)) {
                return true;
            }
            // commit transaction
            transaction.commit();
        } catch (Exception e) {
            if (transaction != null) {
                transaction.rollback();
            }
            e.printStackTrace();
        }
        return false;
    }

}
Note that we have created validate() method to check username and password with the database users table username and password.
7. Hibernate Java-Based Configuration
Next, let's create HibernateUtil class in the "util" package and add the following content to it:
package net.javaguides.hibernate.util;

import java.util.Properties;

import org.hibernate.SessionFactory;
import org.hibernate.boot.registry.StandardServiceRegistryBuilder;
import org.hibernate.cfg.Configuration;
import org.hibernate.cfg.Environment;
import org.hibernate.service.ServiceRegistry;

import net.javaguides.hibernate.model.User;

/**
 * Java based configuration
 * @author ramesh Fadatare
 *
 */
public class HibernateUtil {
    private static SessionFactory sessionFactory;

    public static SessionFactory getSessionFactory() {
        if (sessionFactory == null) {
            try {
                Configuration configuration = new Configuration();

                // Hibernate settings equivalent to hibernate.cfg.xml's properties
                Properties settings = new Properties();
                settings.put(Environment.DRIVER, "com.mysql.jdbc.Driver");
                settings.put(Environment.URL, "jdbc:mysql://localhost:3306/demo?useSSL=false");
                settings.put(Environment.USER, "root");
                settings.put(Environment.PASS, "root");
                settings.put(Environment.DIALECT, "org.hibernate.dialect.MySQL5Dialect");

                settings.put(Environment.SHOW_SQL, "true");

                settings.put(Environment.CURRENT_SESSION_CONTEXT_CLASS, "thread");

                settings.put(Environment.HBM2DDL_AUTO, "update");

                configuration.setProperties(settings);
                configuration.addAnnotatedClass(User.class);

                ServiceRegistry serviceRegistry = new StandardServiceRegistryBuilder()
                    .applySettings(configuration.getProperties()).build();
                System.out.println("Hibernate Java Config serviceRegistry created");
                sessionFactory = configuration.buildSessionFactory(serviceRegistry);
                return sessionFactory;

            } catch (Exception e) {
                e.printStackTrace();
            }
        }
        return sessionFactory;
    }
}
8. Create a LoginController.java
Now, let's create LoginController in a "web" package that acts as a page controller to handle all requests from the client:
package net.javaguides.hibernate.web;

import java.io.IOException;

import javax.servlet.RequestDispatcher;
import javax.servlet.ServletException;
import javax.servlet.annotation.WebServlet;
import javax.servlet.http.HttpServlet;
import javax.servlet.http.HttpServletRequest;
import javax.servlet.http.HttpServletResponse;

import net.javaguides.hibernate.dao.UserDao;

/**
 * @email Ramesh Fadatare
 */

@WebServlet("/login")
public class LoginController extends HttpServlet {
    private static final long serialVersionUID = 1 L;
    private UserDao loginDao;

    public void init() {
        loginDao = new UserDao();
    }

    protected void doGet(HttpServletRequest request, HttpServletResponse response)
    throws ServletException, IOException {
        response.sendRedirect("login.jsp");
    }

    protected void doPost(HttpServletRequest request, HttpServletResponse response)
    throws ServletException, IOException {
        try {
            authenticate(request, response);
        } catch (Exception e) {
            // TODO Auto-generated catch block
            e.printStackTrace();
        }
    }

    private void authenticate(HttpServletRequest request, HttpServletResponse response)
    throws Exception {
        String username = request.getParameter("username");
        String password = request.getParameter("password");

        if (loginDao.validate(username, password)) {
            RequestDispatcher dispatcher = request.getRequestDispatcher("login-success.jsp");
            dispatcher.forward(request, response);
        } else {
            throw new Exception("Login not successful..");
        }
    }
}
9. Login form - login.jsp
Next, create a login.jsp page under the "WebContent" folder and add the following content to it:
<%@ page language="java" contentType="text/html; charset=ISO-8859-1"
 pageEncoding="ISO-8859-1"%>
<!DOCTYPE html>
<html>
<head>
<meta charset="ISO-8859-1">
<title>Insert title here</title>
<link rel="stylesheet"
 href="https://stackpath.bootstrapcdn.com/bootstrap/4.3.1/css/bootstrap.min.css"
 integrity="sha384-ggOyR0iXCbMQv3Xipma34MD+dH/1fQ784/j6cY/iJTQUOhcWr7x9JvoRxT2MZw1T"
 crossorigin="anonymous">
</head>
<body>

 <div class="container col-md-8 col-md-offset-3" style="overflow: auto">
  <h1>Login Form</h1>
  <form action="<%=request.getContextPath()%>/login" method="post">
   <div class="form-group">
    <label for="uname">User Name:</label> <input type="text"
     class="form-control" id="username" placeholder="User Name"
     name="username" required>
   </div>
   <div class="form-group">
    <label for="uname">Password:</label> <input type="password"
     class="form-control" id="password" placeholder="Password"
     name="password" required>
   </div>
   <button type="submit" class="btn btn-primary">Submit</button>
  </form>
 </div>
</body>
</html>
10. Login success page - login-success.jsp
Next, create a login-success.jsp page under the "WebContent" folder and add the following content to it:
<%@ page language="java" contentType="text/html; charset=ISO-8859-1"
 pageEncoding="ISO-8859-1"%>
<!DOCTYPE html>
<html>
<head>
<meta charset="ISO-8859-1">
<title>Insert title here</title>
</head>
<body>
 <div align="center">
  <h1>You have logined successfully</h1>
 </div>
</body>
</html>
11. Demo
That's completed our project development. Next, let's deploy this web application in the Tomcat server in Eclipse IDE.
Important: Before using this Login form, you should have user entries in the database table. So either you can use the previous tutorial to register the users or manually insert the records in the users table.
Type the following URL in your web browser to access this application: http://localhost:8080/login-jsp-servlet-hibernate-mysql-example/login.jsp.

Conclusion
Creating a login form is a fundamental part of many web applications, and integrating technologies like JSP, Servlet, Hibernate Framework, and MySQL database makes the process both efficient and robust. Throughout this tutorial, we have seen how each technology plays a specific role in developing a secure and functional login system.
JSP allowed us to create a dynamic and responsive user interface.
Servlet acted as a bridge between the front end and back end, handling requests and responses.
Hibernate Framework simplified the interaction with the MySQL database, providing an elegant way to map our Java objects to database tables.
MySQL provided a reliable database to store and manage users' information.
Remember, while the example presented is functional, it's always advisable to consider additional security measures and optimizations in a production environment. Tools like input validation, password hashing, and employing HTTPS can further enhance the security of your application.
You can download the source code of this tutorial from my GitHub repository.
Happy coding, and feel free to share your thoughts or questions in the comments below!
My Top and Bestseller Udemy Courses. The sale is going on with a 70 - 80% discount. The discount coupon has been added to each course below:

Build REST APIs with Spring Boot 4, Spring Security 7, and JWT
🆕 High-Demand
80–90% OFF
![[NEW] Learn Apache Maven with IntelliJ IDEA and Java 25](https://img-c.udemycdn.com/course/750x422/6852721_b512_2.jpg "[NEW] Learn Apache Maven with IntelliJ IDEA and Java 25")
[NEW] Learn Apache Maven with IntelliJ IDEA and Java 25
🆕 High-Demand
80–90% OFF

ChatGPT + Generative AI + Prompt Engineering for Beginners
🚀 Trending Now
80–90% OFF
")
Spring 7 and Spring Boot 4 for Beginners (Includes 8 Projects)
🔥 Bestseller
80–90% OFF
Available in Udemy for Business
Available in Udemy for Business

Building Real-Time REST APIs with Spring Boot - Blog App
🔥 Bestseller
80–90% OFF
Available in Udemy for Business
Available in Udemy for Business

Building Microservices with Spring Boot and Spring Cloud
🌟 Top Rated
80–90% OFF
Available in Udemy for Business
Available in Udemy for Business

Java Full-Stack Developer Course with Spring Boot and React JS
🔥 Bestseller
80–90% OFF
Available in Udemy for Business
Available in Udemy for Business

Build 5 Spring Boot Projects with Java: Line-by-Line Coding
🌟 Top Rated
80–90% OFF

Testing Spring Boot Application with JUnit and Mockito
🔥 Bestseller
80–90% OFF
Available in Udemy for Business
Available in Udemy for Business

Spring Boot Thymeleaf Real-Time Web Application - Blog App
🔥 Bestseller
80–90% OFF
Available in Udemy for Business
Available in Udemy for Business

Master Spring Data JPA with Hibernate
🔥 Bestseller
80–90% OFF
Available in Udemy for Business
Available in Udemy for Business

Spring Boot + Apache Kafka Course - The Practical Guide
🎓 Student Favorite
80–90% OFF
Available in Udemy for Business
Available in Udemy for Business


")

I have some troubles when running project javax.persistence.Index[] javax.persistence.Table.indexes()' but I tried everything, ı can't fix.Could you help me ?
ReplyDelete