
🎓 Top 15 Udemy Courses (80-90% Discount): My Udemy Courses - Ramesh Fadatare — All my Udemy courses are real-time and project oriented courses.
▶️ Subscribe to My YouTube Channel (178K+ subscribers): Java Guides on YouTube
▶️ For AI, ChatGPT, Web, Tech, and Generative AI, subscribe to another channel: Ramesh Fadatare on YouTube
Tools and Technologies Used:
We validate the user registration fields with Java bean validation annotations and Hibernate validator implementation.
Basically, we will develop a simple User Registration Module using Role-based Spring Security that can be used in any Spring MVC-based project.
What will we build?
We will build two main functionalities:1. Register a user (stored data in MySQL database).
2. Login Authentication - validate user login credentials with database email and password.
User Registration Page:

Login Page:

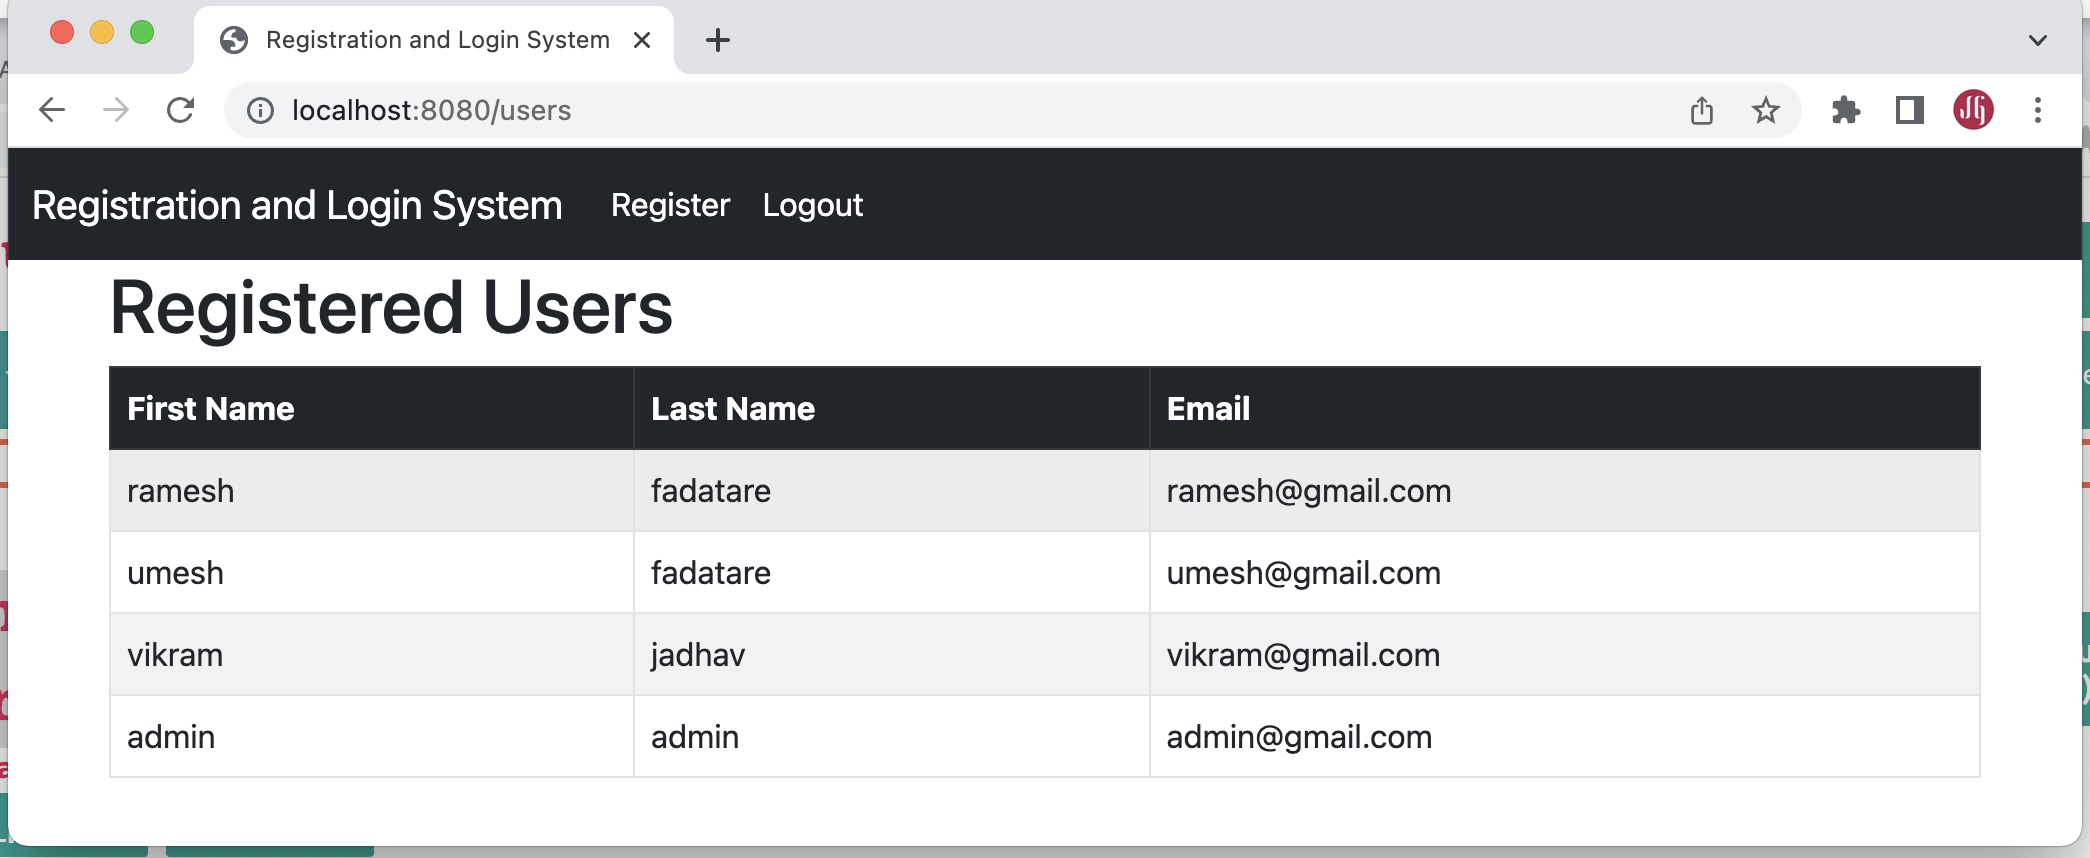
Registered Users Page:
1. Create a Spring Boot Project
- Generate: Maven Project
- Java Version: 17
- Spring Boot: 3.0.0
- Group: net.guides.springboot
- Artifact: registration-login-demo
- Name: registration-login-demo
- Dependencies: Web, JPA, MySQL, Thymeleaf, Security, Lombok
<?xml version="1.0" encoding="UTF-8"?>
<project xmlns="http://maven.apache.org/POM/4.0.0" xmlns:xsi="http://www.w3.org/2001/XMLSchema-instance"
xsi:schemaLocation="http://maven.apache.org/POM/4.0.0 https://maven.apache.org/xsd/maven-4.0.0.xsd">
<modelVersion>4.0.0</modelVersion>
<parent>
<groupId>org.springframework.boot</groupId>
<artifactId>spring-boot-starter-parent</artifactId>
<version>3.0.0</version>
<relativePath/> <!-- lookup parent from repository -->
</parent>
<groupId>com.example</groupId>
<artifactId>registration-login-demo</artifactId>
<version>0.0.1-SNAPSHOT</version>
<name>registration-login-demo</name>
<description>Demo project for Spring Boot</description>
<properties>
<java.version>17</java.version>
</properties>
<dependencies>
<dependency>
<groupId>org.springframework.boot</groupId>
<artifactId>spring-boot-starter-data-jpa</artifactId>
</dependency>
<dependency>
<groupId>org.springframework.boot</groupId>
<artifactId>spring-boot-starter-thymeleaf</artifactId>
</dependency>
<dependency>
<groupId>org.springframework.boot</groupId>
<artifactId>spring-boot-starter-web</artifactId>
</dependency>
<dependency>
<groupId>org.springframework.boot</groupId>
<artifactId>spring-boot-starter-validation</artifactId>
</dependency>
<dependency>
<groupId>mysql</groupId>
<artifactId>mysql-connector-java</artifactId>
<scope>runtime</scope>
</dependency>
<dependency>
<groupId>org.projectlombok</groupId>
<artifactId>lombok</artifactId>
<optional>true</optional>
</dependency>
<dependency>
<groupId>org.springframework.boot</groupId>
<artifactId>spring-boot-starter-test</artifactId>
<scope>test</scope>
</dependency>
<dependency>
<groupId>org.springframework.boot</groupId>
<artifactId>spring-boot-starter-security</artifactId>
</dependency>
</dependencies>
<build>
<plugins>
<plugin>
<groupId>org.springframework.boot</groupId>
<artifactId>spring-boot-maven-plugin</artifactId>
<configuration>
<excludes>
<exclude>
<groupId>org.projectlombok</groupId>
<artifactId>lombok</artifactId>
</exclude>
</excludes>
</configuration>
</plugin>
</plugins>
</build>
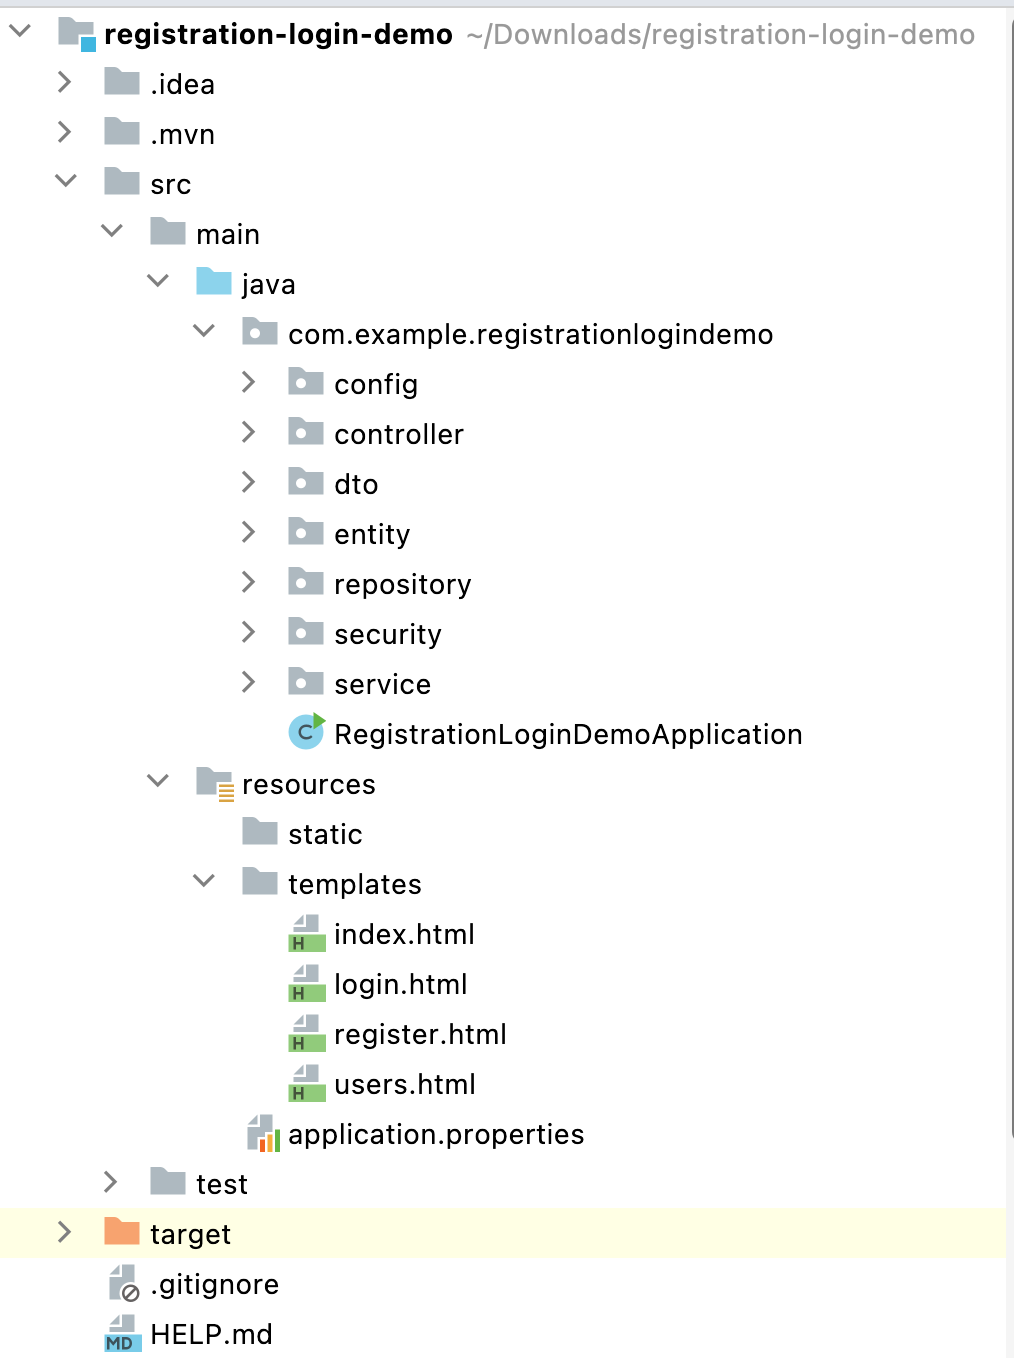
</project>2. Create a Project Structure or Packing Structure
3. Configure MySQL database
Let's use the MySQL database to store and retrieve the data in this example, and we gonna use Hibernate properties to create and drop tables.
Open the application.properties file and add the following configuration to it:
spring.datasource.url=jdbc:mysql://localhost:3306/login_system
spring.datasource.username=root
spring.datasource.password=Mysql@123

spring.jpa.properties.hibernate.dialect=org.hibernate.dialect.MySQLDialect
spring.jpa.hibernate.ddl-auto=update
Ensure you create a login_system database before running the Spring boot application. Also, change the MySQL username and password as per the MySQL installation on your machine.
spring.datasource.url=jdbc:mysql://localhost:3306/login_system
spring.datasource.username=root
spring.datasource.password=Mysql@123
spring.jpa.properties.hibernate.dialect=org.hibernate.dialect.MySQLDialect
spring.jpa.hibernate.ddl-auto=update4. Create JPA Entities - User and Role
User
package com.example.registrationlogindemo.entity;

import jakarta.persistence.*;
import lombok.AllArgsConstructor;
import lombok.Getter;
import lombok.NoArgsConstructor;
import lombok.Setter;

import java.util.ArrayList;
import java.util.List;

@Getter
@Setter
@NoArgsConstructor
@AllArgsConstructor
@Entity
@Table(name="users")
public class User
{
    private static final long serialVersionUID = 1L;

    @Id
    @GeneratedValue(strategy = GenerationType.IDENTITY)
    private Long id;

    @Column(nullable=false)
    private String name;

    @Column(nullable=false, unique=true)
    private String email;

    @Column(nullable=false)
    private String password;

    @ManyToMany(fetch = FetchType.EAGER, cascade=CascadeType.ALL)
    @JoinTable(
            name="users_roles",
            joinColumns={@JoinColumn(name="USER_ID", referencedColumnName="ID")},
            inverseJoinColumns={@JoinColumn(name="ROLE_ID", referencedColumnName="ID")})
    private List<Role> roles = new ArrayList<>();

}
This above code defines a Java class called User that is mapped to a database table called users. The class has several annotations on it:
-
@Getter and @Setter: These annotations are from the Lombok library and automatically generate getter and setter methods for all of the class's fields.
-
@NoArgsConstructor: This annotation is from Lombok and generates a no-argument constructor for the class.
-
@AllArgsConstructor: This annotation is from Lombok and generates a constructor that takes arguments for all of the class's fields.
-
@Entity: This annotation is from the Java Persistence API (JPA) and specifies that the class is a JPA entity, meaning that it is mapped to a database table.
-
@Table(name="users"): This annotation is from JPA and specifies the name of the database table that the entity is mapped to.
-
@Id: This annotation is from JPA and specifies that the field
idis the primary key for the database table. -
@GeneratedValue(strategy = GenerationType.IDENTITY): This annotation is from JPA and specifies that the primary key values are automatically generated by the database using an identity column.
-
@Column(nullable=false): These annotations are from JPA and specify that the fields name, email, and password cannot be null in the database table.
-
@Column(nullable=false, unique=true): This annotation is from JPA and specifies that the email field must be unique in the database table.
-
@ManyToMany(fetch = FetchType.EAGER, cascade=CascadeType.ALL): This annotation is from JPA and specifies that the relationship between User and Role entities is many-to-many.
-
@JoinTable: This annotation is from JPA and specifies the details of the join table that is used to implement the many-to-many relationship between User and Role entities. It specifies the name of the join table (users_roles) and the names of the foreign key columns in the join table (USER_ID and ROLE_ID).
Role
package com.example.registrationlogindemo.entity;

import jakarta.persistence.*;
import lombok.AllArgsConstructor;
import lombok.Getter;
import lombok.NoArgsConstructor;
import lombok.Setter;

import java.util.List;

@Setter
@Getter
@NoArgsConstructor
@AllArgsConstructor
@Entity
@Table(name="roles")
public class Role
{
    @Id
    @GeneratedValue(strategy = GenerationType.IDENTITY)
    private Long id;

    @Column(nullable=false, unique=true)
    private String name;

    @ManyToMany(mappedBy="roles")
    private List<User> users;
}
This above code defines a Java class called Role that is mapped to a database table called roles. The class has several annotations on it:
-
@Getter and @Setter: These annotations are from the Lombok library and automatically generate getter and setter methods for all of the class's fields.
-
@NoArgsConstructor: This annotation is from Lombok and generates a no-argument constructor for the class.
-
@AllArgsConstructor: This annotation is from Lombok and generates a constructor that takes arguments for all of the class's fields.
-
@Entity: This annotation is from the Java Persistence API (JPA) and specifies that the class is a JPA entity, meaning that it is mapped to a database table.
-
@Table(name="users"): This annotation is from JPA and specifies the name of the database table that the entity is mapped to.
-
@Id: This annotation is from JPA and specifies that the field
idis the primary key for the database table. -
@GeneratedValue(strategy = GenerationType.IDENTITY): This annotation is from JPA and specifies that the primary key values are automatically generated by the database using an identity column.
5. Create UserRepository and RoleRepository
UserRepository
package net.javaguides.springboot.repository;

import net.javaguides.springboot.entity.User;
import org.springframework.data.jpa.repository.JpaRepository;

public interface UserRepository extends JpaRepository<User, Long> {

    User findByEmail(String email);

}In addition to the methods provided by JpaRepository, the UserRepository interface also declares a custom method called findByEmail(). This method uses Spring Data JPA's method name query creation feature to generate a query that finds a user by their email address. The method takes a single argument, which is the email address to search for, and it returns a User object if a match is found or null otherwise.
RoleRepository
package net.javaguides.springboot.repository;

import net.javaguides.springboot.entity.Role;
import org.springframework.data.jpa.repository.JpaRepository;

public interface RoleRepository extends JpaRepository<Role, Long> {

    Role findByName(String name);
}In addition to the methods provided by JpaRepository, the RoleRepository interface also declares a custom method called findByName(). This method uses Spring Data JPA's method name query creation feature to generate a query that finds a role by its name. The method takes a single argument, which is the role name to search for, and it returns a Role object if a match is found or null otherwise.
6. Create a Thymeleaf Template for the Home Page
package net.javaguides.springboot.controller;
import org.springframework.stereotype.Controller;
import org.springframework.ui.Model;
import org.springframework.web.bind.annotation.GetMapping;

@Controller
public class AuthController {

    // handler method to handle home page request
    @GetMapping("/index")
    public String home(){
        return "index";
    }
}
The @GetMapping("/index") annotation on the home() method maps HTTP GET requests to the /index URL path to this method. When a user makes a GET request to this URL path, the home() method is executed. This method returns the String "index", the name of a view template that will be resolved by the Spring framework's view resolver.
Thymeleaf Template - Index.html
<!DOCTYPE html>
<html lang="en"
    xmlns:th="http://www.thymeleaf.org"
>
<head>
    <meta charset="UTF-8">
    <title>Registration and Login System</title>
    <link href="https://cdn.jsdelivr.net/npm/bootstrap@5.0.2/dist/css/bootstrap.min.css"
          rel="stylesheet"
          integrity="sha384-EVSTQN3/azprG1Anm3QDgpJLIm9Nao0Yz1ztcQTwFspd3yD65VohhpuuCOmLASjC"
          crossorigin="anonymous">
</head>
<body>
<nav class="navbar navbar-expand-lg navbar-dark bg-dark">
    <div class="container-fluid">
        <a class="navbar-brand" th:href="@{/index}">Registration and Login System</a>
        <button class="navbar-toggler" type="button" data-bs-toggle="collapse" data-bs-target="#navbarSupportedContent" aria-controls="navbarSupportedContent" aria-expanded="false" aria-label="Toggle navigation">
            <span class="navbar-toggler-icon"></span>
        </button>
        <div class="collapse navbar-collapse" id="navbarSupportedContent">
            <ul class="navbar-nav me-auto mb-2 mb-lg-0">
                <li class="nav-item">
                    <a class="nav-link active" aria-current="page" th:href="@{/register}">Register</a>
                </li>
            </ul>
        </div>
    </div>
</nav>
<br /><br />
<div class="container">
    <div class="row">
        <h1 class="text-center"> Registration and Login System </h1>
    </div>
</div>
</body>
</html>
7. Create a Service Layer
UserService Interface
package net.javaguides.springboot.service;

import net.javaguides.springboot.dto.UserDto;
import net.javaguides.springboot.entity.User;

import java.util.List;

public interface UserService {
    void saveUser(UserDto userDto);

    User findUserByEmail(String email);

    List<UserDto> findAllUsers();
}
UserServiceImpl class
e annotation indicates that this class is a Spring service that should be scanned by the Spring framework for dependency injection.package net.javaguides.springboot.service.impl;
import net.javaguides.springboot.dto.UserDto;
import net.javaguides.springboot.entity.Role;
import net.javaguides.springboot.entity.User;
import net.javaguides.springboot.repository.RoleRepository;
import net.javaguides.springboot.repository.UserRepository;
import net.javaguides.springboot.service.UserService;
import org.springframework.security.crypto.password.PasswordEncoder;
import org.springframework.stereotype.Service;
import java.util.Arrays;
import java.util.List;
import java.util.stream.Collectors;
@Service
public class UserServiceImpl implements UserService {
private UserRepository userRepository;
private RoleRepository roleRepository;
private PasswordEncoder passwordEncoder;
public UserServiceImpl(UserRepository userRepository,
RoleRepository roleRepository,
PasswordEncoder passwordEncoder) {
this.userRepository = userRepository;
this.roleRepository = roleRepository;
this.passwordEncoder = passwordEncoder;
}
@Override
public void saveUser(UserDto userDto) {
User user = new User();
user.setName(userDto.getFirstName() + " " + userDto.getLastName());
user.setEmail(userDto.getEmail());
// encrypt the password using spring security
user.setPassword(passwordEncoder.encode(userDto.getPassword()));
Role role = roleRepository.findByName("ROLE_ADMIN");
if(role == null){
role = checkRoleExist();
}
user.setRoles(Arrays.asList(role));
userRepository.save(user);
}
@Override
public User findUserByEmail(String email) {
return userRepository.findByEmail(email);
}
@Override
public List<UserDto> findAllUsers() {
List<User> users = userRepository.findAll();
return users.stream()
.map((user) -> mapToUserDto(user))
.collect(Collectors.toList());
}
private UserDto mapToUserDto(User user){
UserDto userDto = new UserDto();
String[] str = user.getName().split(" ");
userDto.setFirstName(str[0]);
userDto.setLastName(str[1]);
userDto.setEmail(user.getEmail());
return userDto;
}
private Role checkRoleExist(){
Role role = new Role();
role.setName("ROLE_ADMIN");
return roleRepository.save(role);
}
}The UserServiceImpl class implements the UserService interface, which defines several methods for working with users. These methods include:
-
saveUser(UserDto userDto): This method creates a new
UserEntity and saves it to the database. -
findUserByEmail(String email): This method finds a user in the database by their email address. It takes an email address as input and returns the corresponding User entity if it exists.
-
findAllUsers(): This method retrieves a list of all users from the database and maps each User entity to a UserDto object, which contains only the user's name and email address.
8. Create UserDto Model Class
package com.example.registrationlogindemo.dto;

import jakarta.validation.constraints.Email;
import jakarta.validation.constraints.NotEmpty;
import lombok.AllArgsConstructor;
import lombok.Getter;
import lombok.NoArgsConstructor;
import lombok.Setter;

@Getter
@Setter
@NoArgsConstructor
@AllArgsConstructor
public class UserDto
{
    private Long id;
    @NotEmpty
    private String firstName;
    @NotEmpty
    private String lastName;
    @NotEmpty(message = "Email should not be empty")
    @Email
    private String email;
    @NotEmpty(message = "Password should not be empty")
    private String password;
}
9. User Registration Feature Implementation
package net.javaguides.springboot.controller;

import jakarta.validation.Valid;
import net.javaguides.springboot.dto.UserDto;
import org.springframework.stereotype.Controller;
import org.springframework.ui.Model;
import org.springframework.web.bind.annotation.GetMapping;

@Controller
public class AuthController {

    // handler method to handle home page request
    @GetMapping("/index")
    public String home(){
        return "index";
    }

    // handler method to handle user registration form request
    @GetMapping("/register")
    public String showRegistrationForm(Model model){
        // create model object to store form data
        UserDto user = new UserDto();
        model.addAttribute("user", user);
        return "register";
    }
}<!DOCTYPE html>
<html lang="en"
xmlns:th="http://www.thymeleaf.org"
>
<head>
<meta charset="UTF-8">
<title>Registration and Login System</title>
<link href="https://cdn.jsdelivr.net/npm/bootstrap@5.0.2/dist/css/bootstrap.min.css"
rel="stylesheet"
integrity="sha384-EVSTQN3/azprG1Anm3QDgpJLIm9Nao0Yz1ztcQTwFspd3yD65VohhpuuCOmLASjC"
crossorigin="anonymous">
</head>
<body>
<nav class="navbar navbar-expand-lg navbar-dark bg-dark">
<div class="container-fluid">
<a class="navbar-brand" th:href="@{/index}">Registration and Login System</a>
<button class="navbar-toggler" type="button" data-bs-toggle="collapse" data-bs-target="#navbarSupportedContent" aria-controls="navbarSupportedContent" aria-expanded="false" aria-label="Toggle navigation">
<span class="navbar-toggler-icon"></span>
</button>
<div class="collapse navbar-collapse" id="navbarSupportedContent">
<ul class="navbar-nav me-auto mb-2 mb-lg-0">
<li class="nav-item">
<a class="nav-link active" aria-current="page" th:href="@{/login}">Login</a>
</li>
</ul>
</div>
</div>
</nav>
<br /><br /><br />
<div class="container">
<div class="row col-md-8 offset-md-2">
<div class="card">
<div class="card-header">
<h2 class="text-center">Registration</h2>
</div>
<div th:if="${param.success}">
<div class="alert alert-info">
You have successfully registered our app!
</div>
</div>
<div class="card-body">
<form
method="post"
role="form"
th:action="@{/register/save}"
th:object="${user}"
>
<div class="form-group mb-3">
<label class="form-label">First Name</label>
<input
class="form-control"
id="firstName"
name="firstName"
placeholder="Enter first name"
th:field="*{firstName}"
type="text"
/>
<p th:errors = "*{firstName}" class="text-danger"
th:if="${#fields.hasErrors('firstName')}"></p>
</div>
<div class="form-group mb-3">
<label class="form-label">Last Name</label>
<input
class="form-control"
id="lastName"
name="lastName"
placeholder="Enter last name"
th:field="*{lastName}"
type="text"
/>
<p th:errors = "*{lastName}" class="text-danger"
th:if="${#fields.hasErrors('lastName')}"></p>
</div>
<div class="form-group mb-3">
<label class="form-label">Email</label>
<input
class="form-control"
id="email"
name="email"
placeholder="Enter email address"
th:field="*{email}"
type="email"
/>
<p th:errors = "*{email}" class="text-danger"
th:if="${#fields.hasErrors('email')}"></p>
</div>
<div class="form-group mb-3">
<label class="form-label">Password</label>
<input
class="form-control"
id="password"
name="password"
placeholder="Enter password"
th:field="*{password}"
type="password"
/>
<p th:errors = "*{password}" class="text-danger"
th:if="${#fields.hasErrors('password')}"></p>
</div>
<div class="form-group">
<button class="btn btn-primary" type="submit">Register</button>
<span>Already registered? <a th:href="@{/login}">Login here</a></span>
</div>
</form>
</div>
</div>
</div>
</div>
</body>
</html>package net.javaguides.springboot.controller;
import jakarta.validation.Valid;
import net.javaguides.springboot.dto.UserDto;
import net.javaguides.springboot.entity.User;
import net.javaguides.springboot.service.UserService;
import org.springframework.stereotype.Controller;
import org.springframework.ui.Model;
import org.springframework.validation.BindingResult;
import org.springframework.web.bind.annotation.GetMapping;
import org.springframework.web.bind.annotation.ModelAttribute;
import org.springframework.web.bind.annotation.PostMapping;
import java.util.List;
@Controller
public class AuthController {
private UserService userService;
public AuthController(UserService userService) {
this.userService = userService;
}
// handler method to handle home page request
@GetMapping("/index")
public String home(){
return "index";
}
// handler method to handle user registration form request
@GetMapping("/register")
public String showRegistrationForm(Model model){
// create model object to store form data
UserDto user = new UserDto();
model.addAttribute("user", user);
return "register";
}
// handler method to handle user registration form submit request
@PostMapping("/register/save")
public String registration(@Valid @ModelAttribute("user") UserDto userDto,
BindingResult result,
Model model){
User existingUser = userService.findUserByEmail(userDto.getEmail());
if(existingUser != null && existingUser.getEmail() != null && !existingUser.getEmail().isEmpty()){
result.rejectValue("email", null,
"There is already an account registered with the same email");
}
if(result.hasErrors()){
model.addAttribute("user", userDto);
return "/register";
}
userService.saveUser(userDto);
return "redirect:/register?success";
}
}
10. Display List Registered Users
    // handler method to handle list of users
    @GetMapping("/users")
    public String users(Model model){
        List<UserDto> users = userService.findAllUsers();
        model.addAttribute("users", users);
        return "users";
}package net.javaguides.springboot.controller;
import jakarta.validation.Valid;
import net.javaguides.springboot.dto.UserDto;
import net.javaguides.springboot.entity.User;
import net.javaguides.springboot.service.UserService;
import org.springframework.stereotype.Controller;
import org.springframework.ui.Model;
import org.springframework.validation.BindingResult;
import org.springframework.web.bind.annotation.GetMapping;
import org.springframework.web.bind.annotation.ModelAttribute;
import org.springframework.web.bind.annotation.PostMapping;
import java.util.List;
@Controller
public class AuthController {
private UserService userService;
public AuthController(UserService userService) {
this.userService = userService;
}
// handler method to handle home page request
@GetMapping("/index")
public String home(){
return "index";
}
    // handler method to handle login request
    @GetMapping("/login")
    public String login(){
        return "login";
    }
// handler method to handle user registration form request
@GetMapping("/register")
public String showRegistrationForm(Model model){
// create model object to store form data
UserDto user = new UserDto();
model.addAttribute("user", user);
return "register";
}
// handler method to handle user registration form submit request
@PostMapping("/register/save")
public String registration(@Valid @ModelAttribute("user") UserDto userDto,
BindingResult result,
Model model){
User existingUser = userService.findUserByEmail(userDto.getEmail());
if(existingUser != null && existingUser.getEmail() != null && !existingUser.getEmail().isEmpty()){
result.rejectValue("email", null,
"There is already an account registered with the same email");
}
if(result.hasErrors()){
model.addAttribute("user", userDto);
return "/register";
}
userService.saveUser(userDto);
return "redirect:/register?success";
}
// handler method to handle list of users
@GetMapping("/users")
public String users(Model model){
List<UserDto> users = userService.findAllUsers();
model.addAttribute("users", users);
return "users";
}
}<!DOCTYPE html>
<html lang="en"
xmlns:th="http://www.thymeleaf.org"
>
<head>
<meta charset="UTF-8">
<title>Registration and Login System</title>
<link href="https://cdn.jsdelivr.net/npm/bootstrap@5.0.2/dist/css/bootstrap.min.css"
rel="stylesheet"
integrity="sha384-EVSTQN3/azprG1Anm3QDgpJLIm9Nao0Yz1ztcQTwFspd3yD65VohhpuuCOmLASjC"
crossorigin="anonymous">
</head>
<body>
<nav class="navbar navbar-expand-lg navbar-dark bg-dark">
<div class="container-fluid">
<a class="navbar-brand" th:href="@{/index}">Registration and Login System</a>
<button class="navbar-toggler" type="button" data-bs-toggle="collapse" data-bs-target="#navbarSupportedContent" aria-controls="navbarSupportedContent" aria-expanded="false" aria-label="Toggle navigation">
<span class="navbar-toggler-icon"></span>
</button>
<div class="collapse navbar-collapse" id="navbarSupportedContent">
<ul class="navbar-nav me-auto mb-2 mb-lg-0">
<li class="nav-item">
<a class="nav-link active" aria-current="page" th:href="@{/logout}">Logout</a>
</li>
</ul>
</div>
</div>
</nav>
<div class="container">
<div class="row col-md-10">
<h2>List of Registered Users</h2>
</div>
<table class="table table-bordered table-hover">
<thead class="table-dark">
<tr>
<th>First Name</th>
<th>Last Name</th>
<th>Email</th>
</tr>
</thead>
<tbody>
<tr th:each = "user : ${users}">
<td th:text = "${user.firstName}"></td>
<td th:text = "${user.lastName}"></td>
<td th:text = "${user.email}"></td>
</tr>
</tbody>
</table>
</div>
</body>
</html>11. Create a Custom Login Form
// handler method to handle login request
@GetMapping("/login")
public String login(){
return "login";
}<!DOCTYPE html>
<html lang="en"
xmlns:th="http://www.thymeleaf.org"
>
<head>
<meta charset="UTF-8">
<title>Registration and Login System</title>
<link href="https://cdn.jsdelivr.net/npm/bootstrap@5.0.2/dist/css/bootstrap.min.css"
rel="stylesheet"
integrity="sha384-EVSTQN3/azprG1Anm3QDgpJLIm9Nao0Yz1ztcQTwFspd3yD65VohhpuuCOmLASjC"
crossorigin="anonymous">
</head>
<body>
<nav class="navbar navbar-expand-lg navbar-dark bg-dark">
<div class="container-fluid">
<a class="navbar-brand" th:href="@{/index}">Registration and Login System</a>
<button class="navbar-toggler" type="button" data-bs-toggle="collapse" data-bs-target="#navbarSupportedContent" aria-controls="navbarSupportedContent" aria-expanded="false" aria-label="Toggle navigation">
<span class="navbar-toggler-icon"></span>
</button>
<div class="collapse navbar-collapse" id="navbarSupportedContent">
<ul class="navbar-nav me-auto mb-2 mb-lg-0">
<li class="nav-item">
<a class="nav-link active" aria-current="page" th:href="@{/register}">Register</a>
</li>
</ul>
</div>
</div>
</nav>
<br /><br />
<div class="container">
<div class="row">
<div class="col-md-6 offset-md-3">
<div th:if="${param.error}">
<div class="alert alert-danger">Invalid Email or Password</div>
</div>
<div th:if="${param.logout}">
<div class="alert alert-success"> You have been logged out.</div>
</div>
<div class="card">
<div class="card-header">
<h2 class="text-center">Login Form</h2>
</div>
<div class="card-body">
<form
method="post"
role="form"
th:action="@{/login}"
class="form-horizontal"
>
<div class="form-group mb-3">
<label class="control-label"> Email</label>
<input
type="text"
id="username"
name="username"
class="form-control"
placeholder="Enter email address"
/>
</div>
<div class="form-group mb-3">
<label class="control-label"> Password</label>
<input
type="password"
id="password"
name="password"
class="form-control"
placeholder="Enter password"
/>
</div>
<div class="form-group mb-3">
<button type="submit" class="btn btn-primary" >Submit</button>
<span> Not registered ?
<a th:href="@{/register}">Register/Signup here</a>
</span>
</div>
</form>
</div>
</div>
</div>
</div>
</div>
</body>
</html>12. Configure Spring Security
package com.example.registrationlogindemo.config;

import org.springframework.beans.factory.annotation.Autowired;
import org.springframework.context.annotation.Bean;
import org.springframework.context.annotation.Configuration;
import org.springframework.security.config.annotation.authentication.builders.AuthenticationManagerBuilder;
import org.springframework.security.config.annotation.web.builders.HttpSecurity;
import org.springframework.security.config.annotation.web.configuration.EnableWebSecurity;
import org.springframework.security.core.userdetails.UserDetailsService;
import org.springframework.security.crypto.bcrypt.BCryptPasswordEncoder;
import org.springframework.security.crypto.password.PasswordEncoder;
import org.springframework.security.web.SecurityFilterChain;
import org.springframework.security.web.util.matcher.AntPathRequestMatcher;

@Configuration
@EnableWebSecurity
public class SpringSecurity {

    @Autowired
    private UserDetailsService userDetailsService;

    @Bean
    public static PasswordEncoder passwordEncoder(){
        return new BCryptPasswordEncoder();
    }

    @Bean
    public SecurityFilterChain filterChain(HttpSecurity http) throws Exception {
        http.csrf().disable()
                .authorizeHttpRequests((authorize) ->
                        authorize.requestMatchers("/register/**").permitAll()
                                .requestMatchers("/index").permitAll()
                                .requestMatchers("/users").hasRole("ADMIN")
                ).formLogin(
                        form -> form
                                .loginPage("/login")
                                .loginProcessingUrl("/login")
                                .defaultSuccessUrl("/users")
                                .permitAll()
                ).logout(
                        logout -> logout
                                .logoutRequestMatcher(new AntPathRequestMatcher("/logout"))
                                .permitAll()
                );
        return http.build();
    }

    @Autowired
    public void configureGlobal(AuthenticationManagerBuilder auth) throws Exception {
        auth
                .userDetailsService(userDetailsService)
                .passwordEncoder(passwordEncoder());
    }
}13. Database Authentication Implementation
CustomUserDetailsService
Let's create a CustomUserDetailsService class with the following content:package com.example.registrationlogindemo.security;
import com.example.registrationlogindemo.entity.Role;
import com.example.registrationlogindemo.entity.User;
import com.example.registrationlogindemo.repository.UserRepository;
import org.springframework.security.core.GrantedAuthority;
import org.springframework.security.core.authority.SimpleGrantedAuthority;
import org.springframework.security.core.userdetails.UserDetails;
import org.springframework.security.core.userdetails.UserDetailsService;
import org.springframework.security.core.userdetails.UsernameNotFoundException;
import org.springframework.stereotype.Service;
import java.util.Collection;
import java.util.stream.Collectors;
@Service
public class CustomUserDetailsService implements UserDetailsService {
private UserRepository userRepository;
public CustomUserDetailsService(UserRepository userRepository) {
this.userRepository = userRepository;
}
@Override
public UserDetails loadUserByUsername(String email) throws UsernameNotFoundException {
User user = userRepository.findByEmail(email);
if (user != null) {
return new org.springframework.security.core.userdetails.User(user.getEmail(),
user.getPassword(),
mapRolesToAuthorities(user.getRoles()));
}else{
throw new UsernameNotFoundException("Invalid username or password.");
}
}
private Collection < ? extends GrantedAuthority> mapRolesToAuthorities(Collection <Role> roles) {
Collection < ? extends GrantedAuthority> mapRoles = roles.stream()
.map(role -> new SimpleGrantedAuthority(role.getName()))
.collect(Collectors.toList());
return mapRoles;
}
}14. Demo

Click on the Register link to navigate to the Registration page:
Click on the Login link to navigate to the Login page:
ADMIN user will access this Registered Users Page:
15. Source Code on GitHub
16. Conclusion
Related Tutorials
My Top and Bestseller Udemy Courses. The sale is going on with a 70 - 80% discount. The discount coupon has been added to each course below:

Build REST APIs with Spring Boot 4, Spring Security 7, and JWT
![[NEW] Learn Apache Maven with IntelliJ IDEA and Java 25](https://img-c.udemycdn.com/course/750x422/6852721_b512_2.jpg "[NEW] Learn Apache Maven with IntelliJ IDEA and Java 25")
[NEW] Learn Apache Maven with IntelliJ IDEA and Java 25

ChatGPT + Generative AI + Prompt Engineering for Beginners
")
Spring 7 and Spring Boot 4 for Beginners (Includes 8 Projects)
Available in Udemy for Business

Building Real-Time REST APIs with Spring Boot - Blog App
Available in Udemy for Business

Building Microservices with Spring Boot and Spring Cloud
Available in Udemy for Business

Java Full-Stack Developer Course with Spring Boot and React JS
Available in Udemy for Business

Build 5 Spring Boot Projects with Java: Line-by-Line Coding

Testing Spring Boot Application with JUnit and Mockito
Available in Udemy for Business

Spring Boot Thymeleaf Real-Time Web Application - Blog App
Available in Udemy for Business

Master Spring Data JPA with Hibernate
Available in Udemy for Business

Spring Boot + Apache Kafka Course - The Practical Guide
Available in Udemy for Business


")

it's nice thank you for this
ReplyDeleteThanks!
ReplyDeletevery usefull thanks
ReplyDeleteHi, sorry but you have here a mistake:
ReplyDeleteClass << ? > [] groups() default {};
Class << ? extends Payload > [] payload() default {};
I looked it in your project, and next one is right:
Class < ? > [] groups() default {};
Class < ? extends Payload > [] payload() default {};
Ya, it's formatting issue and i fixed it. Thanks for reporting.
Deletenot getting the "principal.username" in index page, please help!
ReplyDeletechange thymeleaf-extras-springsecurity4 to thymeleaf-extras-springsecurity5 in your pom.xml file.
Deletesorry sir, when i wasn't input any field in the registration form, but i did not inform any error, could u tell me why.
ReplyDeleteLook,
Deletehttps://github.com/caiofernandomf/registration-login-springboot-security-thymeleaf
Hi, I add some @onetomany FetchType.LAZY and in this project it not throw LazyInitializationException but in other project throw. What is the reason?
ReplyDeleteThis comment has been removed by the author.
ReplyDeleteHibernate will automatically create the tables.
DeleteThanks for your response..
Deletewhere is the source code
ReplyDeleteGitHub repo link given at the end of this tutorial.
DeleteThank you very much for this useful tutorial. Highly appreciated !!!
ReplyDeleteHi Ramesh,
ReplyDeleteI am new to spring boot
I did follow the steps but I am getting (JSP file [/WEB-INF/jsp/login.jsp] not found)
what I am missing, do I need to rename the HTML files to jsp and copy it to the WEB-INF location
Hi, i did everything as said in the tutorial, except the csrf, since its deprecated.
ReplyDeleteNow, when I try to sign in, my console returns 'because "this.userService" is null'.
Tracing back this error, its by the initisalisation of UserService in the AuthController, where it says "Could not autowire. No beans of 'UserService' type found. ".
Have you any idea how to fix this?
Make sure you annotated UserServiceImpl class with @Service annotation.
DeleteHi Ramesh!
ReplyDeleteThank you for this tutorial!
I didn't catch, how did you create default roles and users. Cloned from you repo working and it contains users in db, but my project with your tutorial doesn't. Where default values of users and roles are written?