
🎓 Check Out My Top 25 Udemy Courses (80-90% Discount): My Udemy Courses - Ramesh Fadatare
This tutorial walks you through the process of creating a simple web application with resources that are protected by Spring Security.
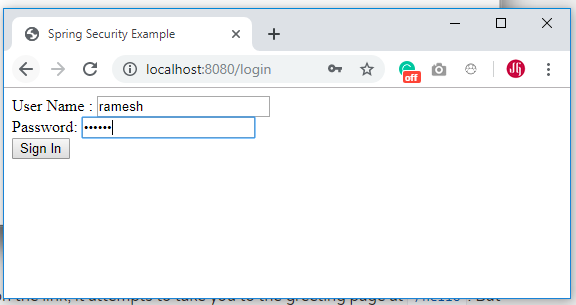
 When you click on the link, it attempts to take you to the greeting page at /hello. But because that page is secured and you have not yet logged in, it takes you to the login page:
 At the login page, sign in as the test user by entering "ramesh" and "ramesh" for the username and password fields, respectively. Once you submit the login form, you are authenticated and then taken to the greeting page:
 If you click on the "Sign Out" button, your authentication is revoked, and you are returned to the login page with a message indicating you are logged out.
What we’ll build
We'll build a Spring MVC application that secures the page with a login form backed by a fixed list of users.
Development Steps
- Creating a Spring Boot Application
- Project Structure
- Maven Dependencies - Pom.xml
- Create an unsecured web application
- Set up Spring Security
- Running the Application
- Demo
- Conclusion
1. Creating a Spring Boot Application
There are many ways to create a Spring Boot application. You can refer below articles to create a Spring Boot application.
>> Create Spring Boot Project With Spring Initializer
>> Create Spring Boot Project in Spring Tool Suite [STS]
>> Create Spring Boot Project in Spring Tool Suite [STS]
2. Project Structure
Following is the package or project structure for your reference -
Maven Dependencies - Pom.xml
<?xml version="1.0" encoding="UTF-8"?>
<project
    xmlns="http://maven.apache.org/POM/4.0.0"
    xmlns:xsi="http://www.w3.org/2001/XMLSchema-instance"
 xsi:schemaLocation="http://maven.apache.org/POM/4.0.0 https://maven.apache.org/xsd/maven-4.0.0.xsd">
    <modelVersion>4.0.0</modelVersion>
    <parent>
        <groupId>org.springframework.boot</groupId>
        <artifactId>spring-boot-starter-parent</artifactId>
        <version>2.1.0.RELEASE</version>
        <relativePath />
        <!-- lookup parent from repository -->
    </parent>
    <groupId>net.javaguides.springboot</groupId>
    <artifactId>springboot-web-app-security</artifactId>
    <version>0.0.1-SNAPSHOT</version>
    <name>springboot-web-app-security</name>
    <description>springboot-web-app-security</description>
    <properties>
        <java.version>1.8</java.version>
    </properties>
    <dependencies>
        <dependency>
            <groupId>org.springframework.boot</groupId>
            <artifactId>spring-boot-starter-thymeleaf</artifactId>
        </dependency>
        <dependency>
            <groupId>org.springframework.boot</groupId>
            <artifactId>spring-boot-starter-web</artifactId>
        </dependency>
        <dependency>
            <groupId>org.springframework.boot</groupId>
            <artifactId>spring-boot-starter-test</artifactId>
            <scope>test</scope>
        </dependency>
    </dependencies>
    <build>
        <plugins>
            <plugin>
                <groupId>org.springframework.boot</groupId>
                <artifactId>spring-boot-maven-plugin</artifactId>
            </plugin>
        </plugins>
    </build>
</project>
Create an Unsecured Web Application
Before we apply security to a web application, let's create a very simple web application. Then we secure it with Spring Security in the next section.
The web application includes two simple views: a home page and a "Hello World" page. The home page is defined in the following Thymeleaf template:
src/main/resources/templates/home.html
<!DOCTYPE html>
<html xmlns="http://www.w3.org/1999/xhtml" xmlns:th="https://www.thymeleaf.org" xmlns:sec="https://www.thymeleaf.org/thymeleaf-extras-springsecurity3">
    <head>
        <title>Spring Security Example</title>
    </head>
    <body>
        <h1>Welcome!</h1>

        <p>Click <a th:href="@{/hello}">here</a> to see a greeting.</p>
    </body>
</html>
Notice that, this simple view includes a link to the page "/hello". That is defined in the following Thymeleaf template:
src/main/resources/templates/hello.html
<!DOCTYPE html>
<html xmlns="http://www.w3.org/1999/xhtml" xmlns:th="https://www.thymeleaf.org"
      xmlns:sec="https://www.thymeleaf.org/thymeleaf-extras-springsecurity3">
    <head>
        <title>Hello World!</title>
    </head>
    <body>
        <h1>Hello world!</h1>
    </body>
</html>
SpringMvcConfig
The web application is based on Spring MVC. Thus we need to configure Spring MVC and set up view controllers to expose these templates.
Here’s a configuration class for configuring Spring MVC in the application.
package net.javaguides.springboot;

import org.springframework.context.annotation.Configuration;
import org.springframework.web.servlet.config.annotation.ViewControllerRegistry;
import org.springframework.web.servlet.config.annotation.WebMvcConfigurer;

@Configuration
public class SpringMvcConfig implements WebMvcConfigurer {

    public void addViewControllers(ViewControllerRegistry registry) {
        registry.addViewController("/home").setViewName("home");
        registry.addViewController("/").setViewName("home");
        registry.addViewController("/hello").setViewName("hello");
        registry.addViewController("/login").setViewName("login");
    }
}
The addViewControllers() method (overriding the method of the same name in WebMvcConfigurer) adds four view controllers. Two of the view controllers reference the view whose name is "home" (defined in home.html), and another references the view named "hello" (defined in hello.html). The fourth view controller references another view named "login". We'll create that view in the next section.
Set up Spring Security
Suppose that we want to prevent unauthorized users from viewing the greeting page at "/hello". As it is now, if users click the link on the home page, they see the greeting with no barriers to stop them. we need to add a barrier that forces the user to sign in before seeing that page.
You do that by configuring Spring Security in the application. If Spring Security is on the classpath, then Spring Boot automatically secures all HTTP endpoints with "basic" authentication. But you can further customize the security settings. The first thing we need to do is add Spring Security to the classpath.
Let's open the pom.xml file and add the following maven dependency to it:
        <dependency>
            <groupId>org.springframework.boot</groupId>
            <artifactId>spring-boot-starter-security</artifactId>
        </dependency>
WebSecurityConfig
Here’s a security configuration that ensures that only authenticated users can see the secret greeting:
package net.javaguides.springboot;

import org.springframework.context.annotation.Bean;
import org.springframework.context.annotation.Configuration;
import org.springframework.security.config.annotation.authentication.builders.AuthenticationManagerBuilder;
import org.springframework.security.config.annotation.web.builders.HttpSecurity;
import org.springframework.security.config.annotation.web.configuration.EnableWebSecurity;
import org.springframework.security.config.annotation.web.configuration.WebSecurityConfigurerAdapter;
import org.springframework.security.core.userdetails.User;
import org.springframework.security.core.userdetails.UserDetails;
import org.springframework.security.core.userdetails.UserDetailsService;
import org.springframework.security.provisioning.InMemoryUserDetailsManager;

@Configuration
@EnableWebSecurity
public class WebSecurityConfig extends WebSecurityConfigurerAdapter {
    @Override
    protected void configure(HttpSecurity http) throws Exception {
        http
            .authorizeRequests()
            .antMatchers("/", "/home").permitAll()
            .anyRequest().authenticated()
            .and()
            .formLogin()
            .loginPage("/login")
            .permitAll()
            .and()
            .logout()
            .permitAll();
    }


    @Override
    protected void configure(AuthenticationManagerBuilder auth) throws Exception {
        auth.inMemoryAuthentication()
            .withUser("ramesh").password("{noop}ramesh").roles("USER").and()
            .withUser("admin")
            .password("{noop}admin").credentialsExpired(true)
            .accountExpired(true).accountLocked(true)
            .authorities("WRITE_PRIVILEGES", "READ_PRIVILEGES")
            .roles("ADMIN");
    }
}
The WebSecurityConfig class is annotated with @EnableWebSecurity to enable Spring Security’s web security support and provide the Spring MVC integration. It also extends WebSecurityConfigurerAdapter and overrides a couple of its methods to set some specifics of the web security configuration.
The configure(HttpSecurity) method defines which URL paths should be secured and which should not. Specifically, the "/" and "/home" paths are configured to not require any authentication. All other paths must be authenticated.
src/main/resources/templates/login.html
Now we need to create the login page. There’s already a view controller for the "login" view, so we only need to create the login view itself:
<!DOCTYPE html>
<html xmlns="http://www.w3.org/1999/xhtml" xmlns:th="https://www.thymeleaf.org"
      xmlns:sec="https://www.thymeleaf.org/thymeleaf-extras-springsecurity3">
    <head>
        <title>Spring Security Example </title>
    </head>
    <body>
        <div th:if="${param.error}">
            Invalid username and password.
        </div>
        <div th:if="${param.logout}">
            You have been logged out.
        </div>
        <form th:action="@{/login}" method="post">
            <div><label> User Name : <input type="text" name="username"/> </label></div>
            <div><label> Password: <input type="password" name="password"/> </label></div>
            <div><input type="submit" value="Sign In"/></div>
        </form>
    </body>
</html>
Last we need to provide the user a way to display the current username and Sign Out. Update the hello.html to say hello to the current user and contain a "Sign Out" form as shown below
src/main/resources/templates/hello.html
<!DOCTYPE html>
<html xmlns="http://www.w3.org/1999/xhtml" xmlns:th="https://www.thymeleaf.org"
      xmlns:sec="https://www.thymeleaf.org/thymeleaf-extras-springsecurity3">
    <head>
        <title>Hello World!</title>
    </head>
    <body>
        <h1 th:inline="text">Hello [[${#httpServletRequest.remoteUser}]]!</h1>
        <form th:action="@{/logout}" method="post">
            <input type="submit" value="Sign Out"/>
        </form>
    </body>
</html>
The "Sign Out" form submits a POST to "/logout". Upon successfully logging out it will redirect the user to "/login?logout".
Running the Application
Let's run this application using Application class which is an entry point of our spring boot application. The main() method uses Spring Boot’s SpringApplication.run() method to launch an application.
package net.javaguides.springboot;

import org.springframework.boot.SpringApplication;
import org.springframework.boot.autoconfigure.SpringBootApplication;

@SpringBootApplication
public class Application {

 public static void main(String[] args) {
  SpringApplication.run(Application.class, args);
 }
}
Demo
Once the application starts up, point your browser to http://localhost:8080. You should see the home page:
Conclusion
In this tutorial, we have developed a simple web application that is secured with Spring Security.
Download source code from my GitHub repository at https://github.com/RameshMF/spring-security-tutorial.
My Top and Bestseller Udemy Courses. The sale is going on with a 70 - 80% discount. The discount coupon has been added to each course below:

Build REST APIs with Spring Boot 4, Spring Security 7, and JWT
🆕 High-Demand
80–90% OFF
![[NEW] Learn Apache Maven with IntelliJ IDEA and Java 25](https://img-c.udemycdn.com/course/750x422/6852721_b512_2.jpg "[NEW] Learn Apache Maven with IntelliJ IDEA and Java 25")
[NEW] Learn Apache Maven with IntelliJ IDEA and Java 25
🆕 High-Demand
80–90% OFF

ChatGPT + Generative AI + Prompt Engineering for Beginners
🚀 Trending Now
80–90% OFF
")
Spring 7 and Spring Boot 4 for Beginners (Includes 8 Projects)
🔥 Bestseller
80–90% OFF
Available in Udemy for Business
Available in Udemy for Business

Building Real-Time REST APIs with Spring Boot - Blog App
🔥 Bestseller
80–90% OFF
Available in Udemy for Business
Available in Udemy for Business

Building Microservices with Spring Boot and Spring Cloud
🌟 Top Rated
80–90% OFF
Available in Udemy for Business
Available in Udemy for Business

Java Full-Stack Developer Course with Spring Boot and React JS
🔥 Bestseller
80–90% OFF
Available in Udemy for Business
Available in Udemy for Business

Build 5 Spring Boot Projects with Java: Line-by-Line Coding
🌟 Top Rated
80–90% OFF

Testing Spring Boot Application with JUnit and Mockito
🔥 Bestseller
80–90% OFF
Available in Udemy for Business
Available in Udemy for Business

Spring Boot Thymeleaf Real-Time Web Application - Blog App
🔥 Bestseller
80–90% OFF
Available in Udemy for Business
Available in Udemy for Business

Master Spring Data JPA with Hibernate
🔥 Bestseller
80–90% OFF
Available in Udemy for Business
Available in Udemy for Business

Spring Boot + Apache Kafka Course - The Practical Guide
🎓 Student Favorite
80–90% OFF
Available in Udemy for Business
Available in Udemy for Business


")

Comments
Post a Comment
Leave Comment