
🎓 Top 15 Udemy Courses (80-90% Discount): My Udemy Courses - Ramesh Fadatare — All my Udemy courses are real-time and project oriented courses.
▶️ Subscribe to My YouTube Channel (178K+ subscribers): Java Guides on YouTube
▶️ For AI, ChatGPT, Web, Tech, and Generative AI, subscribe to another channel: Ramesh Fadatare on YouTube
In the previous article, we have seen JSP Servlet JDBC MySQL CRUD Example Tutorial.
In this article, we will learn step-by-step how to build a User Management web application using JSP, Servlet, Hibernate, and MySQL database. In this article, we will use Hibernate Java-based configuration without using XML-based configuration(hibernate.cfg.xml) to connect to the MySQL database.
In this article, we will learn step-by-step how to build a User Management web application using JSP, Servlet, Hibernate, and MySQL database. In this article, we will use Hibernate Java-based configuration without using XML-based configuration(hibernate.cfg.xml) to connect to the MySQL database.
Before deep dive into building web applications, let's quickly recap what is JSP, Servlet, Hibernate, and the MySQL database.
JSP (JavaServer Pages)
JSP stands for JavaServer Pages. It's a technology used for building dynamic web content. Unlike static HTML, JSP allows you to embed Java code and expressions directly within your HTML code. This ability to mix Java with HTML enables developers to create dynamic web pages that can change content, appearance, and behavior based on user input or other interactions.
Learn everything about JSP here at JSP Tutorial
Servlets
A Servlet is a Java class used in web development to handle HTTP requests and responses. It acts as a middleman between the client's request from a web browser and the server's response.
Servlets can be used to process forms, control the flow of an application, and generate dynamic content. They form an essential part of the Java EE (Enterprise Edition) specification and provide a robust, scalable solution for web development.
Learn everything about Servlets here at Servlet Tutorial
Hibernate
Hibernate is an Object-Relational Mapping (ORM) framework for Java. It simplifies database interaction by allowing developers to use regular Java objects to represent database tables. This means that you can write Java code to interact with your database, rather than writing complex SQL queries.
Hibernate takes care of translating these Java interactions into the necessary database commands, allowing for more portable and maintainable code.
Learn everything about Servlets here at Hibernate Tutorial
MySQL Database
MySQL is one of the most popular open-source relational database management systems (RDBMS) in the world. It uses Structured Query Language (SQL) to access, manipulate, and manage data stored in relational databases.
MySQL is known for its speed, reliability, and ease of use. It's used by many large-scale websites and applications to store and manage data in a structured and efficient way.
JSP Servlet Hibernate Web Application
- Create a User
- Update a User
- Delete a User
- Retrieve a User
- List of all Users

Tools and technologies used
- JSP
- Hibernate
- IDE - STS/Eclipse
- JDK - 1.8 or later
- Apache Tomcat
- JSTL
- Servlet API
- MySQL
Development Steps
- Create an Eclipse Dynamic Web Project
- Add Dependencies
- Project Structure
- MySQL Database Setup
- Create a JPA entity - User.java
- Hibernate Java-based configuration
- Create a UserDAO.java
- Create a UserServlet.java
- Creating User Listing JSP Page - user-list.jsp
- Create a User Form JSP Page - user-form.jsp
- Creating Error JSP page
- Deploying and Testing the Application Demo
1. Create an Eclipse Dynamic Web Project
To create a new dynamic Web project in Eclipse:
1. On the main menu select File > New > Project....
2. In the upcoming wizard choose Web > Dynamic Web Project.

3. Click Next.
4. Enter project name as "jsp-servlet-hibernate-mysql-example";5. Make sure that the target runtime is set to Apache Tomcat with the currently supported version.
2. Add Dependencies
Add the latest release of the below jar files to the lib folder:

You can download all these JAR files from my GitHub repository - jsp-servlet-hibernate-mysql-tutorial
3. Project Structure
Standard project structure for your reference -

4. MySQL Database Setup
Let's create a database named "demo" in MySQL. Now, create a users table using below DDL script:
CREATE DATABASE 'demo';
USE demo;

create table users (
 id  int(3) NOT NULL AUTO_INCREMENT,
 name varchar(120) NOT NULL,
 email varchar(220) NOT NULL,
 country varchar(120),
 PRIMARY KEY (id)
);
You can use either MySQL Command Line Client or MySQL Workbench tool to create the database. The above users table looks like this:

5. Create a JPA Entity - User.java
Let's create a User JPA entity that is mapped to a database table - users.
package net.javaguides.usermanagement.model;

import javax.persistence.*;

/**
 * User.java
 * This is a model class represents a User entity
 * @author Ramesh Fadatare
 *
 */

@Entity
@Table(name="users")
public class User {

    @Id
    @GeneratedValue(strategy=GenerationType.IDENTITY)
    @Column(name="id")
    protected int id;

    @Column(name="name")
    protected String name;

    @Column(name="email")
    protected String email;

    @Column(name="country")
    protected String country;

    public User() {
    }

    public User(String name, String email, String country) {
        super();
        this.name = name;
        this.email = email;
        this.country = country;
    }

    public User(int id, String name, String email, String country) {
        super();
        this.id = id;
        this.name = name;
        this.email = email;
        this.country = country;
    }

    public int getId() {
        return id;
    }
    public void setId(int id) {
        this.id = id;
    }
    public String getName() {
        return name;
    }
    public void setName(String name) {
        this.name = name;
    }
    public String getEmail() {
        return email;
    }
    public void setEmail(String email) {
        this.email = email;
    }
    public String getCountry() {
        return country;
    }
    public void setCountry(String country) {
        this.country = country;
    }
}
Let's understand the annotations used in the above class:
@Entity: This annotation indicates that the class is a JPA entity, meaning that it will be mapped to a database table. @Table: This specifies the name of the table in the database to which this entity will be mapped. In this case, the table name is "users"
@Id: This marks the field as the primary key for the database table.
@GeneratedValue(strategy=GenerationType.IDENTITY): This specifies how the primary key will be generated. The IDENTITY strategy means that the database will generate a new value for each insert.
@Column: This annotation map the field to the corresponding column in the database table, allowing custom column name and its attributes.
6. Hibernate Java-based configuration
The below diagram shows Java code for Hibernate settings equivalent to hibernate.cfg.xml properties:

Open HibernateUtil class and add the following code to it:
package net.javaguides.usermanagement.utl;

import java.util.Properties;

import org.hibernate.SessionFactory;
import org.hibernate.boot.registry.StandardServiceRegistryBuilder;
import org.hibernate.cfg.Configuration;
import org.hibernate.cfg.Environment;
import org.hibernate.service.ServiceRegistry;

import net.javaguides.usermanagement.model.User;

/**
 * Java based configuration
 * @author ramesh Fadatare
 *
 */
public class HibernateUtil {
    private static SessionFactory sessionFactory;

    public static SessionFactory getSessionFactory() {
         if (sessionFactory == null) {
            try {
                 Configuration configuration = new Configuration();

                 // Hibernate settings equivalent to hibernate.cfg.xml's properties
                 Properties settings = new Properties();
                 settings.put(Environment.DRIVER, "com.mysql.jdbc.Driver");
                 settings.put(Environment.URL, "jdbc:mysql://localhost:3306/demo?useSSL=false");
                 settings.put(Environment.USER, "root");
                 settings.put(Environment.PASS, "root");
                 settings.put(Environment.DIALECT, "org.hibernate.dialect.MySQL5Dialect");

                 settings.put(Environment.SHOW_SQL, "true");

                 settings.put(Environment.CURRENT_SESSION_CONTEXT_CLASS, "thread");

                 settings.put(Environment.HBM2DDL_AUTO, "create-drop");

                 configuration.setProperties(settings);
                 configuration.addAnnotatedClass(User.class);

                 ServiceRegistry serviceRegistry = new StandardServiceRegistryBuilder()
                 .applySettings(configuration.getProperties()).build();
                 System.out.println("Hibernate Java Config serviceRegistry created");
                 sessionFactory = configuration.buildSessionFactory(serviceRegistry);
                 return sessionFactory;

              } catch (Exception e) {
                 e.printStackTrace();
              }
          }
        return sessionFactory;
    }
}
The Configuration object is used to configure Hibernate settings. In this code, settings are applied programmatically using the Properties object, which is equivalent to setting them in the hibernate.cfg.xml file.
The configuration.addAnnotatedClass(User.class) method call adds the User class as an entity, allowing Hibernate to map it to a database table.
The ServiceRegistry is responsible for holding and managing services that Hibernate uses. It's constructed with the settings from the Configuration object.
7. Create a UserDAO.java
Let's create a UserDAO class which is a Data Access Layer (DAO) class that provides CRUD (Create, Read, Update, Delete) operations using for the users table in a database using Hibernate. Here’s the full source code of the UserDAO:
The saveUser(User user) saves a User object to the database.package net.javaguides.usermanagement.dao; import java.util.List; import org.hibernate.Session; import org.hibernate.Transaction; import net.javaguides.usermanagement.model.User; import net.javaguides.usermanagement.utl.HibernateUtil; /** * CRUD database operations * @author Ramesh Fadatare * */ public class UserDao { /** * Save User * @param user */ public void saveUser(User user) { Transaction transaction = null; try (Session session = HibernateUtil.getSessionFactory().openSession()) { // start a transaction transaction = session.beginTransaction(); // save the student object session.save(user); // commit transaction transaction.commit(); } catch (Exception e) { if (transaction != null) { transaction.rollback(); } e.printStackTrace(); } } /** * Update User * @param user */ public void updateUser(User user) { Transaction transaction = null; try (Session session = HibernateUtil.getSessionFactory().openSession()) { // start a transaction transaction = session.beginTransaction(); // save the student object session.update(user); // commit transaction transaction.commit(); } catch (Exception e) { if (transaction != null) { transaction.rollback(); } e.printStackTrace(); } } /** * Delete User * @param id */ public void deleteUser(int id) { Transaction transaction = null; try (Session session = HibernateUtil.getSessionFactory().openSession()) { // start a transaction transaction = session.beginTransaction(); // Delete a user object User user = session.get(User.class, id); if (user != null) { session.delete(user); System.out.println("user is deleted"); } // commit transaction transaction.commit(); } catch (Exception e) { if (transaction != null) { transaction.rollback(); } e.printStackTrace(); } } /** * Get User By ID * @param id * @return */ public User getUser(int id) { Transaction transaction = null; User user = null; try (Session session = HibernateUtil.getSessionFactory().openSession()) { // start a transaction transaction = session.beginTransaction(); // get an user object user = session.get(User.class, id); // commit transaction transaction.commit(); } catch (Exception e) { if (transaction != null) { transaction.rollback(); } e.printStackTrace(); } return user; } /** * Get all Users * @return */ @SuppressWarnings("unchecked") public List < User > getAllUser() { Transaction transaction = null; List < User > listOfUser = null; try (Session session = HibernateUtil.getSessionFactory().openSession()) { // start a transaction transaction = session.beginTransaction(); // get an user object listOfUser = session.createQuery("from User").getResultList(); // commit transaction transaction.commit(); } catch (Exception e) { if (transaction != null) { transaction.rollback(); } e.printStackTrace(); } return listOfUser; } }
The updateUser(User user) updates an existing User object in the database.
The deleteUser(int id) deletes a User object from the database by its ID.
The getUser(int id) retrieves a User object from the database by its ID
The getAllUser() retrieves all User objects from the database.
8. Create a UserServlet.java
Now, let's create a UserServlet that acts as a page controller to handle all requests from the client.
Let’s look at the code first:
Let's understand the above code:package net.javaguides.usermanagement.web; import java.io.IOException; import java.sql.SQLException; import java.util.List; import javax.servlet.RequestDispatcher; import javax.servlet.ServletException; import javax.servlet.annotation.WebServlet; import javax.servlet.http.HttpServlet; import javax.servlet.http.HttpServletRequest; import javax.servlet.http.HttpServletResponse; import net.javaguides.usermanagement.dao.UserDao; import net.javaguides.usermanagement.model.User; /** * ControllerServlet.java * This servlet acts as a page controller for the application, handling all * requests from the user. * @email Ramesh Fadatare */ @WebServlet("/") public class UserServlet extends HttpServlet { private static final long serialVersionUID = 1L; private UserDao userDao; public void init() { userDao = new UserDao(); } protected void doPost(HttpServletRequest request, HttpServletResponse response) throws ServletException, IOException { doGet(request, response); } protected void doGet(HttpServletRequest request, HttpServletResponse response) throws ServletException, IOException { String action = request.getServletPath(); try { switch (action) { case "/new": showNewForm(request, response); break; case "/insert": insertUser(request, response); break; case "/delete": deleteUser(request, response); break; case "/edit": showEditForm(request, response); break; case "/update": updateUser(request, response); break; default: listUser(request, response); break; } } catch (SQLException ex) { throw new ServletException(ex); } } private void listUser(HttpServletRequest request, HttpServletResponse response) throws SQLException, IOException, ServletException { List < User > listUser = userDao.getAllUser(); request.setAttribute("listUser", listUser); RequestDispatcher dispatcher = request.getRequestDispatcher("user-list.jsp"); dispatcher.forward(request, response); } private void showNewForm(HttpServletRequest request, HttpServletResponse response) throws ServletException, IOException { RequestDispatcher dispatcher = request.getRequestDispatcher("user-form.jsp"); dispatcher.forward(request, response); } private void showEditForm(HttpServletRequest request, HttpServletResponse response) throws SQLException, ServletException, IOException { int id = Integer.parseInt(request.getParameter("id")); User existingUser = userDao.getUser(id); RequestDispatcher dispatcher = request.getRequestDispatcher("user-form.jsp"); request.setAttribute("user", existingUser); dispatcher.forward(request, response); } private void insertUser(HttpServletRequest request, HttpServletResponse response) throws SQLException, IOException { String name = request.getParameter("name"); String email = request.getParameter("email"); String country = request.getParameter("country"); User newUser = new User(name, email, country); userDao.saveUser(newUser); response.sendRedirect("list"); } private void updateUser(HttpServletRequest request, HttpServletResponse response) throws SQLException, IOException { int id = Integer.parseInt(request.getParameter("id")); String name = request.getParameter("name"); String email = request.getParameter("email"); String country = request.getParameter("country"); User user = new User(id, name, email, country); userDao.updateUser(user); response.sendRedirect("list"); } private void deleteUser(HttpServletRequest request, HttpServletResponse response) throws SQLException, IOException { int id = Integer.parseInt(request.getParameter("id")); userDao.deleteUser(id); response.sendRedirect("list"); } }
UserServlet extends HttpServlet, making it capable of handling HTTP requests.
The @WebServlet("/") annotation maps this servlet to the root URL path of the application.
The servlet initializes an instance of UserDao, which is likely a DAO (Data Access Object) class responsible for database interactions related to user management.
The doPost() method redirects POST requests to the doGet method.
The doGet() method handles GET requests by switching on the servlet path and calling the appropriate method for various user-related actions (e.g., showing a new form, inserting a user, deleting a user, etc.).
9. Creating User Listing JSP Page - user-list.jsp
Next, create a JSP page for displaying all users from the database.
Let's create a list-user.jsp page under the WebContent directory in the project with the following code:
<%@ page language="java" contentType="text/html; charset=UTF-8"
pageEncoding="UTF-8"%>
<%@ taglib uri="http://java.sun.com/jsp/jstl/core" prefix="c" %>
<html>
<head>
<title>User Management Application</title>
</head>
<body>
<center>
<h1>User Management</h1>
<h2>
<a href="new">Add New User</a>
<a href="list">List All Users</a>
</h2>
</center>
<div align="center">
<table border="1" cellpadding="5">
<caption><h2>List of Users</h2></caption>
<tr>
<th>ID</th>
<th>Name</th>
<th>Email</th>
<th>Country</th>
<th>Actions</th>
</tr>
<c:forEach var="user" items="${listUser}">
<tr>
<td><c:out value="${user.id}" /></td>
<td><c:out value="${user.name}" /></td>
<td><c:out value="${user.email}" /></td>
<td><c:out value="${user.country}" /></td>
<td>
<a href="edit?id=<c:out value='${user.id}' />">Edit</a>
<a href="delete?id=<c:out value='${user.id}' />">Delete</a>
</td>
</tr>
</c:forEach>
</table>
</div>
</body>
</html>
The taglib directive includes the JSTL (JavaServer Pages Standard Tag Library) core library, allowing the use of common tags like looping and output.
The <c:forEach> tag iterates over a collection of users and populates the table rows with the user details.


10. Create a User Form JSP Page - user-form.jsp
Next, we create a JSP page for creating a new User called user-form.jsp. Here’s its full source code:
<%@ page language="java" contentType="text/html; charset=UTF-8"
pageEncoding="UTF-8"%>
<%@ taglib uri="http://java.sun.com/jsp/jstl/core" prefix="c" %>
<html>
<head>
<title>User Management Application</title>
</head>
<body>
<center>
<h1>User Management</h1>
<h2>
<a href="new">Add New User</a>
<a href="list">List All Users</a>
</h2>
</center>
<div align="center">
<c:if test="${user != null}">
<form action="update" method="post">
</c:if>
<c:if test="${user == null}">
<form action="insert" method="post">
</c:if>
<table border="1" cellpadding="5">
<caption>
<h2>
<c:if test="${user != null}">
Edit User
</c:if>
<c:if test="${user == null}">
Add New User
</c:if>
</h2>
</caption>
<c:if test="${user != null}">
<input type="hidden" name="id" value="<c:out value='${user.id}' />" />
</c:if>
<tr>
<th>User Name: </th>
<td>
<input type="text" name="name" size="45"
value="<c:out value='${user.name}' />"
/>
</td>
</tr>
<tr>
<th>User Email: </th>
<td>
<input type="text" name="email" size="45"
value="<c:out value='${user.email}' />"
/>
</td>
</tr>
<tr>
<th>Country: </th>
<td>
<input type="text" name="country" size="15"
value="<c:out value='${user.country}' />"
/>
</td>
</tr>
<tr>
<td colspan="2" align="center">
<input type="submit" value="Save" />
</td>
</tr>
</table>
</form>
</div>
</body>
</html>
The above page acts for both functionalities to create a new User and Edit the same user.
11. Creating Error JSP page
Here’s the code of the Error.jsp page which simply shows the exception message:
<%@ page language="java" contentType="text/html; charset=UTF-8"
    pageEncoding="UTF-8" isErrorPage="true" %>
<!DOCTYPE html PUBLIC "-//W3C//DTD HTML 4.01 Transitional//EN"
 "http://www.w3.org/TR/html4/loose.dtd">
<html>
<head>
<title>Error</title>
</head>
<body>
   <center>
      <h1>Error</h1>
      <h2><%=exception.getMessage() %><br/> </h2>
   </center>
</body>
</html>
12. Deploying and Testing the Application
It's time to see a demo of the above User Management web application. Deploy this web application to the Tomcat server.
Type the following URL in your web browser to access the User Management application: http://localhost:8080/jsp-servlet-jdbc-mysql-crud-example/
Create a new User
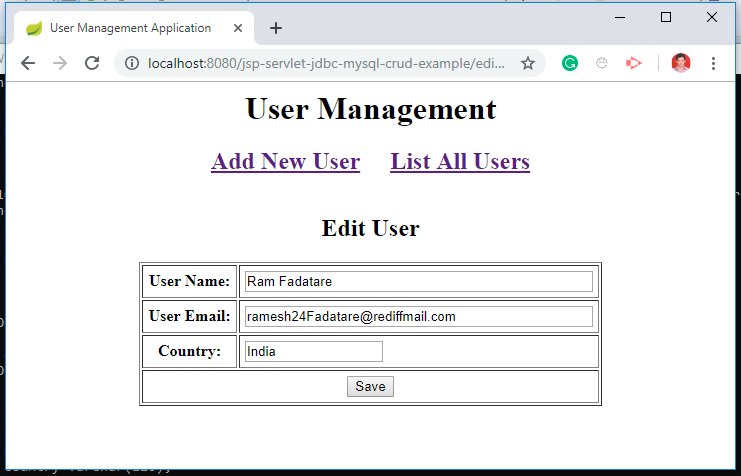
Edit a User
List of all Users
GitHub Repository - Download Source Code
The source code for this tutorial (User Management) is available on my GitHub repository.
Related Servlet Posts
- What is a Servlet in Java?
- Servlet Life Cycle
- Servlet Interface Example
- GenericServlet Class Example
- HttpServlet Class Example Tutorial
- HttpServlet doGet() Method Example
- HttpServlet doPost() Method Example
- @WebServlet Annotation Example
- @WebInitParam Annotation Example
- @WebListener Annotation Example
- @WebFilter Annotation Example
- @MultipartConfig Annotation Example
- How to Return a JSON Response from a Java Servlet
- Servlet Registration Form + JDBC + MySQL Database Example
- Login Form Servlet + JDBC + MySQL Example
- Servlet JDBC Eclipse Example Tutorial
- JSP Servlet JDBC MySQL CRUD Example Tutorial
- Servlet + JSP + JDBC + MySQL Example
- Registration Form using JSP + Servlet + JDBC + Mysql Example
- Login Form using JSP + Servlet + JDBC + MySQL Example
- JSP Servlet Hibernate CRUD Example
- JSP Servlet Hibernate Web Application
- Hibernate Registration Form Example with JSP, Servlet, MySQL
- Login Form using JSP + Servlet + Hibernate + MySQL Example
My Top and Bestseller Udemy Courses. The sale is going on with a 70 - 80% discount. The discount coupon has been added to each course below:

Build REST APIs with Spring Boot 4, Spring Security 7, and JWT
🆕 High-Demand
80–90% OFF
![[NEW] Learn Apache Maven with IntelliJ IDEA and Java 25](https://img-c.udemycdn.com/course/750x422/6852721_b512_2.jpg "[NEW] Learn Apache Maven with IntelliJ IDEA and Java 25")
[NEW] Learn Apache Maven with IntelliJ IDEA and Java 25
🆕 High-Demand
80–90% OFF

ChatGPT + Generative AI + Prompt Engineering for Beginners
🚀 Trending Now
80–90% OFF
")
Spring 7 and Spring Boot 4 for Beginners (Includes 8 Projects)
🔥 Bestseller
80–90% OFF
Available in Udemy for Business
Available in Udemy for Business

Building Real-Time REST APIs with Spring Boot - Blog App
🔥 Bestseller
80–90% OFF
Available in Udemy for Business
Available in Udemy for Business

Building Microservices with Spring Boot and Spring Cloud
🌟 Top Rated
80–90% OFF
Available in Udemy for Business
Available in Udemy for Business

Java Full-Stack Developer Course with Spring Boot and React JS
🔥 Bestseller
80–90% OFF
Available in Udemy for Business
Available in Udemy for Business

Build 5 Spring Boot Projects with Java: Line-by-Line Coding
🌟 Top Rated
80–90% OFF

Testing Spring Boot Application with JUnit and Mockito
🔥 Bestseller
80–90% OFF
Available in Udemy for Business
Available in Udemy for Business

Spring Boot Thymeleaf Real-Time Web Application - Blog App
🔥 Bestseller
80–90% OFF
Available in Udemy for Business
Available in Udemy for Business

Master Spring Data JPA with Hibernate
🔥 Bestseller
80–90% OFF
Available in Udemy for Business
Available in Udemy for Business

Spring Boot + Apache Kafka Course - The Practical Guide
🎓 Student Favorite
80–90% OFF
Available in Udemy for Business
Available in Udemy for Business


")

Hello, thank you for the work you do and share. On this application 'JSP Servlet Hibernate Web Application' I am experiencing two problems that have the same origin:
ReplyDelete1. As soon as I load the list-user.jsp page no user is displayed, despite the fact that I have previously populated the database;
2. I believe problem 1 occurs because every time I launch the application from Eclipse's Tomcat server, the application itself deletes the all the data in the database. This is obviously not a good thing, not retaining previously saved data is a big problem.
Can you kindly help me figure out how to make the application not delete the database every time it is launched?
Change this property: settings.put(Environment.HBM2DDL_AUTO, "update");
Delete