
🎓 Top 15 Udemy Courses (80-90% Discount): My Udemy Courses - Ramesh Fadatare — All my Udemy courses are real-time and project oriented courses.
▶️ Subscribe to My YouTube Channel (178K+ subscribers): Java Guides on YouTube
▶️ For AI, ChatGPT, Web, Tech, and Generative AI, subscribe to another channel: Ramesh Fadatare on YouTube
In this tutorial, we will learn to integrate MongoDB with a Spring Boot Application and perform different CRUD operations (Create, Read, Update, and Delete operations) on the Product entity.
MongoDB is a document database with the scalability and flexibility that you want with the querying and indexing that you need.
Learn Spring boot at https://www.javaguides.net/p/spring-boot-tutorial.html.
Read more about MongoDB at the official website.
Setup MongoDB
To work with MongoDB, you need to have MongoDB installed in your system. Check out the official MongoDB doc for installing MongoDB in your System.
You can also install the Zip version of MongoDB in Windows, check out this article at https://www.javaguides.net/2019/12/install-mongodb-zip-in-windows.html.
Tools and technologies used
- Spring Boot - 3+
- Spring Framework - 6+
- MongoDB - 3.8.2
- JDK - 17 or later
- Maven - 3.5.1
- IDE - STS/Eclipse
Let me list out the development steps so that it will be easy to develop and understand the Spring Boot Application with MongoDB step by step.
Development Steps
1. Create a Spring Boot Application
2. The pom.xml File - Define Maven Dependencies
3. Project Structure
4. Configuring MongoDB database
5. Creating the Product Model
6. Create a Spring Data Repository - ProductRepository.java
7. Service Layer (uses repository)
8. Creating the APIs - ProductController
9. Running Spring boot application
10. Test REST APIs Using Postman Client
1. Create a Spring Boot Application
There are many ways to create a Spring Boot application. You can refer below articles to create a Spring Boot application.
2. The pom.xml File - Define Maven Dependencies
Let's define all the spring boot starter maven dependencies required to build this application in the below pom.xml file:
<?xml version="1.0" encoding="UTF-8"?>
<project
    xmlns="http://maven.apache.org/POM/4.0.0"
    xmlns:xsi="http://www.w3.org/2001/XMLSchema-instance"
 xsi:schemaLocation="http://maven.apache.org/POM/4.0.0 https://maven.apache.org/xsd/maven-4.0.0.xsd">
    <modelVersion>4.0.0</modelVersion>
    <parent>
        <groupId>org.springframework.boot</groupId>
        <artifactId>spring-boot-starter-parent</artifactId>
        <version>3.0.4</version>
        <relativePath />
        <!-- lookup parent from repository -->
    </parent>
    <groupId>net.springboot.javaguides</groupId>
    <artifactId>springboot-mongodb-crud</artifactId>
    <version>0.0.1-SNAPSHOT</version>
    <name>springboot-thymeleaf-web-app</name>
    <description>Demo project for Spring Boot + Mongo DB CRUD Example
 </description>
    <properties>
        <java.version>17</java.version>
    </properties>
    <dependencies>
        <dependency>
            <groupId>org.springframework.boot</groupId>
            <artifactId>spring-boot-starter-data-mongodb</artifactId>
        </dependency>
        <dependency>
            <groupId>org.springframework.boot</groupId>
            <artifactId>spring-boot-starter-web</artifactId>
        </dependency>  <dependency>            <groupId>org.springframework.boot</groupId>
            <artifactId>spring-boot-starter-validation</artifactId>
        </dependency>        <dependency>
            <groupId>org.springframework.boot</groupId>
            <artifactId>spring-boot-starter-test</artifactId>
            <scope>test</scope>
            <exclusions>
                <exclusion>
                    <groupId>org.junit.vintage</groupId>
                    <artifactId>junit-vintage-engine</artifactId>
                </exclusion>
            </exclusions>
        </dependency>
    </dependencies>
    <build>
        <plugins>
            <plugin>
                <groupId>org.springframework.boot</groupId>
                <artifactId>spring-boot-maven-plugin</artifactId>
            </plugin>
        </plugins>
    </build>
</project>
3. Project Structure
Following is the packing structure for your reference -

4. Configuring MongoDB database
Spring Boot tries to auto-configure most of the stuff for you based on the dependencies that you have added in the pom.xml file.
Since we have added a spring-boot-starter-mongodb dependency, Spring Boot tries to build a connection with MongoDB by reading the database configuration from the application.properties file.
Open the application.properties file and add the following MongoDB properties -
# MONGODB (MongoProperties)
spring.data.mongodb.uri=mongodb://localhost:27017/ProductDB
As per our configuration, Mongo DB is running locally at default port 27017.
Note that we need to create a "ProductDB" database using the following command:
use ProductDB
If the "ProductDB" database is not present in MongoDB then it will create a new one.
5. Creating the Product Model
Let’s now create the Product model which will be mapped to a Document in the MongoDB database. Create a new package model inside net.springboot.javaguides, and add a file Product.java inside the model package with the following contents -
package net.springboot.javaguides.model;

import jakarta.validation.constraints.NotBlank;
import jakarta.validation.constraints.Size;

import org.springframework.data.annotation.Id;
import org.springframework.data.mongodb.core.index.Indexed;
import org.springframework.data.mongodb.core.mapping.Document;

@Document(collection = "ProductDB")
public class Product {

    @Id
    private long id;

    @NotBlank
    @Size(max = 100)
    @Indexed(unique = true)
    private String name;
    private String description;

    public long getId() {
        return id;
    }
    public void setId(long id) {
        this.id = id;
    }
    public String getName() {
        return name;
    }
    public void setName(String name) {
        this.name = name;
    }
    public String getDescription() {
        return description;
    }
    public void setDescription(String description) {
        this.description = description;
    }
}
We have an annotated name with @Indexed annotation and marked it as unique. This creates a unique index on the name field.
Also, We make sure that the product’s name is not blank by annotating it with @NotBlank annotation.
6. Create a Spring Data Repository - ProductRepository.java
Next, we need to create ProductRepository for accessing data from the database.
package net.springboot.javaguides.repository;

import org.springframework.data.mongodb.repository.MongoRepository;

import net.springboot.javaguides.model.Product;

public interface ProductRepository extends MongoRepository < Product, Long > {

}
7. Service Layer (uses repository)
The service layer is optional – still recommended to perform additional business logic if any. Generally, we will connect with the repository here for crud operations.
ProductService.java
package net.springboot.javaguides.service;

import java.util.List;

import net.springboot.javaguides.model.Product;

public interface ProductService {
    Product createProduct(Product product);

    Product updateProduct(Product product);

    List < Product > getAllProduct();

    Product getProductById(long productId);

    void deleteProduct(long id);
}
ProductServiceImpl.java
package net.springboot.javaguides.service;

import java.util.List;
import java.util.Optional;

import org.springframework.beans.factory.annotation.Autowired;
import org.springframework.stereotype.Service;
import org.springframework.transaction.annotation.Transactional;

import net.springboot.javaguides.exception.ResourceNotFoundException;
import net.springboot.javaguides.model.Product;
import net.springboot.javaguides.repository.ProductRepository;

@Service
@Transactional
public class ProductServiceImpl implements ProductService {


    @Autowired
    private ProductRepository productRepository;


    @Override
    public Product createProduct(Product product) {
        return productRepository.save(product);
    }

    @Override
    public Product updateProduct(Product product) {
        Optional < Product > productDb = this.productRepository.findById(product.getId());

        if (productDb.isPresent()) {
            Product productUpdate = productDb.get();
            productUpdate.setId(product.getId());
            productUpdate.setName(product.getName());
            productUpdate.setDescription(product.getDescription());
            productRepository.save(productUpdate);
            return productUpdate;
        } else {
            throw new ResourceNotFoundException("Record not found with id : " + product.getId());
        }
    }

    @Override
    public List < Product > getAllProduct() {
        return this.productRepository.findAll();
    }

    @Override
    public Product getProductById(long productId) {

        Optional < Product > productDb = this.productRepository.findById(productId);

        if (productDb.isPresent()) {
            return productDb.get();
        } else {
            throw new ResourceNotFoundException("Record not found with id : " + productId);
        }
    }

    @Override
    public void deleteProduct(long productId) {
        Optional < Product > productDb = this.productRepository.findById(productId);

        if (productDb.isPresent()) {
            this.productRepository.delete(productDb.get());
        } else {
            throw new ResourceNotFoundException("Record not found with id : " + productId);
        }

    }
}
8. Creating the APIs - ProductController
Finally, let’s create the APIs which will be exposed to the clients:
package net.springboot.javaguides.controller;

import java.util.List;

import org.springframework.beans.factory.annotation.Autowired;
import org.springframework.http.HttpStatus;
import org.springframework.http.ResponseEntity;
import org.springframework.web.bind.annotation.DeleteMapping;
import org.springframework.web.bind.annotation.GetMapping;
import org.springframework.web.bind.annotation.PathVariable;
import org.springframework.web.bind.annotation.PostMapping;
import org.springframework.web.bind.annotation.PutMapping;
import org.springframework.web.bind.annotation.RequestBody;
import org.springframework.web.bind.annotation.RestController;

import net.springboot.javaguides.model.Product;
import net.springboot.javaguides.service.ProductService;

@RestController
public class ProductController {

    @Autowired
    private ProductService productService;

    @GetMapping("/products")
    public ResponseEntity < List < Product >> getAllProduct() {
        return ResponseEntity.ok().body(productService.getAllProduct());
    }

    @GetMapping("/products/{id}")
    public ResponseEntity < Product > getProductById(@PathVariable long id) {
        return ResponseEntity.ok().body(productService.getProductById(id));
    }

    @PostMapping("/products")
    public ResponseEntity < Product > createProduct(@RequestBody Product product) {
        return ResponseEntity.ok().body(this.productService.createProduct(product));
    }

    @PutMapping("/products/{id}")
    public ResponseEntity < Product > updateProduct(@PathVariable long id, @RequestBody Product product) {
        product.setId(id);
        return ResponseEntity.ok().body(this.productService.updateProduct(product));
    }

    @DeleteMapping("/products/{id}")
    public HttpStatus deleteProduct(@PathVariable long id) {
        this.productService.deleteProduct(id);
        return HttpStatus.OK;
    }
}
ResourceNotFoundException
package net.springboot.javaguides.exception;

import org.springframework.web.bind.annotation.ResponseStatus;

@ResponseStatus
public class ResourceNotFoundException extends RuntimeException {

    private static final long serialVersionUID = 1 L;

    public ResourceNotFoundException(String message) {
        super(message);
    }

    public ResourceNotFoundException(String message, Throwable throwable) {
        super(message, throwable);
    }
}
Running Spring boot application
This spring boot application has an entry point Java class called Application.java with the public static void main(String[] args) method, which you can run to start the application.
package net.springboot.javaguides;

import org.springframework.boot.SpringApplication;
import org.springframework.boot.autoconfigure.SpringBootApplication;

@SpringBootApplication
public class Application {

    public static void main(String[] args) {
        SpringApplication.run(Application.class, args);
    }
}
Test REST APIs Using Postman Client
Create Product Rest API - Post HTTP Request

Update Product Rest API - PUT HTTP Request

Delete Product Rest API - Delete HTTP Request

Get Product Rest API - Get HTTP Request

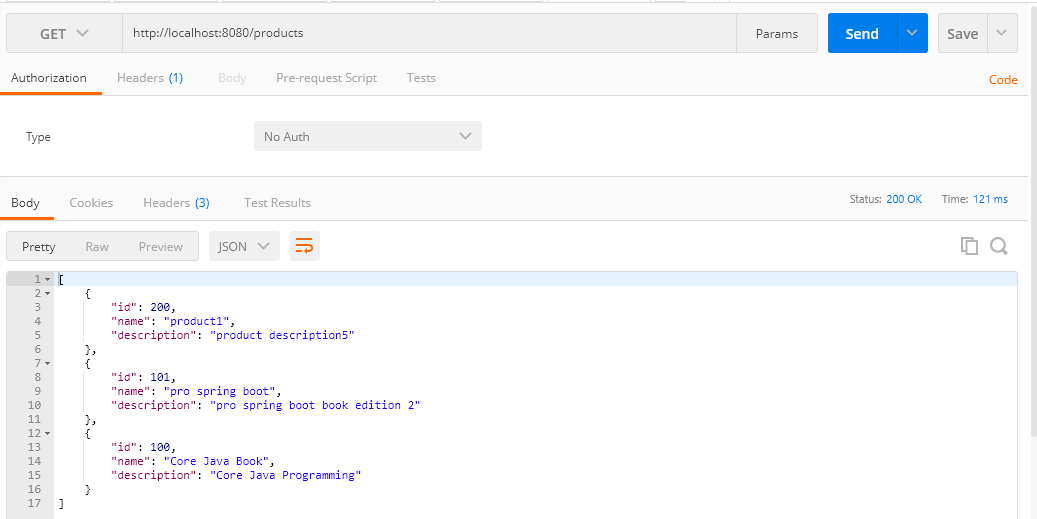
Get All Product Rest API - Get HTTP Request
GitHub Repository
Download source code of this tutorial from my GitHub repository at https://github.com/RameshMF/spring-boot-tutorial.
My Top and Bestseller Udemy Courses. The sale is going on with a 70 - 80% discount. The discount coupon has been added to each course below:

Build REST APIs with Spring Boot 4, Spring Security 7, and JWT
🆕 High-Demand
80–90% OFF
![[NEW] Learn Apache Maven with IntelliJ IDEA and Java 25](https://img-c.udemycdn.com/course/750x422/6852721_b512_2.jpg "[NEW] Learn Apache Maven with IntelliJ IDEA and Java 25")
[NEW] Learn Apache Maven with IntelliJ IDEA and Java 25
🆕 High-Demand
80–90% OFF

ChatGPT + Generative AI + Prompt Engineering for Beginners
🚀 Trending Now
80–90% OFF
")
Spring 7 and Spring Boot 4 for Beginners (Includes 8 Projects)
🔥 Bestseller
80–90% OFF
Available in Udemy for Business
Available in Udemy for Business

Building Real-Time REST APIs with Spring Boot - Blog App
🔥 Bestseller
80–90% OFF
Available in Udemy for Business
Available in Udemy for Business

Building Microservices with Spring Boot and Spring Cloud
🌟 Top Rated
80–90% OFF
Available in Udemy for Business
Available in Udemy for Business

Java Full-Stack Developer Course with Spring Boot and React JS
🔥 Bestseller
80–90% OFF
Available in Udemy for Business
Available in Udemy for Business

Build 5 Spring Boot Projects with Java: Line-by-Line Coding
🌟 Top Rated
80–90% OFF

Testing Spring Boot Application with JUnit and Mockito
🔥 Bestseller
80–90% OFF
Available in Udemy for Business
Available in Udemy for Business

Spring Boot Thymeleaf Real-Time Web Application - Blog App
🔥 Bestseller
80–90% OFF
Available in Udemy for Business
Available in Udemy for Business

Master Spring Data JPA with Hibernate
🔥 Bestseller
80–90% OFF
Available in Udemy for Business
Available in Udemy for Business

Spring Boot + Apache Kafka Course - The Practical Guide
🎓 Student Favorite
80–90% OFF
Available in Udemy for Business
Available in Udemy for Business


")

Nice tutorial, simple and explanatory. Thanks Ramesh!
ReplyDelete