
🎓 Check Out My Top 25 Udemy Courses (80-90% Discount): My Udemy Courses - Ramesh Fadatare
In this tutorial, we will learn how to create a docker image for the Spring boot application and deploy a docker image in a docker container.
Note that we are going to Spring boot 3 to create a Spring boot application.
Development Steps
- Create a Spring boot application
- Build a simple REST API
- Create Dockerfile
- Build Docker Image
- Run Docker Image in a Container
- Demo
Create a Spring boot application
Spring Boot provides a web tool called Spring Initializer to bootstrap an application quickly. Just go to https://start.spring.io/ and generate a new spring boot project.
Use the below details in the Spring boot creation:
Project Name: springboot-docker-demo
Project Type: Maven
Choose dependencies: Spring Web
Package name: net.javaguides.springboot
Packaging: Jar
Here is the pom.xml file for your reference:
<?xml version="1.0" encoding="UTF-8"?>
<project xmlns="http://maven.apache.org/POM/4.0.0" xmlns:xsi="http://www.w3.org/2001/XMLSchema-instance"
	xsi:schemaLocation="http://maven.apache.org/POM/4.0.0 https://maven.apache.org/xsd/maven-4.0.0.xsd">
	<modelVersion>4.0.0</modelVersion>
	<parent>
		<groupId>org.springframework.boot</groupId>
		<artifactId>spring-boot-starter-parent</artifactId>
		<version>3.0.0</version>
		<relativePath/> <!-- lookup parent from repository -->
	</parent>
	<groupId>net.javaguides</groupId>
	<artifactId>springboot-docker-demo</artifactId>
	<version>0.0.1-SNAPSHOT</version>
	<name>springboot-docker-demo</name>
	<description>Demo project for Spring Boot and Docker</description>
	<properties>
		<java.version>17</java.version>
	</properties>
	<dependencies>
		<dependency>
			<groupId>org.springframework.boot</groupId>
			<artifactId>spring-boot-starter-web</artifactId>
		</dependency>

		<dependency>
			<groupId>org.springframework.boot</groupId>
			<artifactId>spring-boot-starter-test</artifactId>
			<scope>test</scope>
		</dependency>
	</dependencies>

	<build>
		<plugins>
			<plugin>
				<groupId>org.springframework.boot</groupId>
				<artifactId>spring-boot-maven-plugin</artifactId>
			</plugin>
		</plugins>
	</build>

</project>
Project Structure
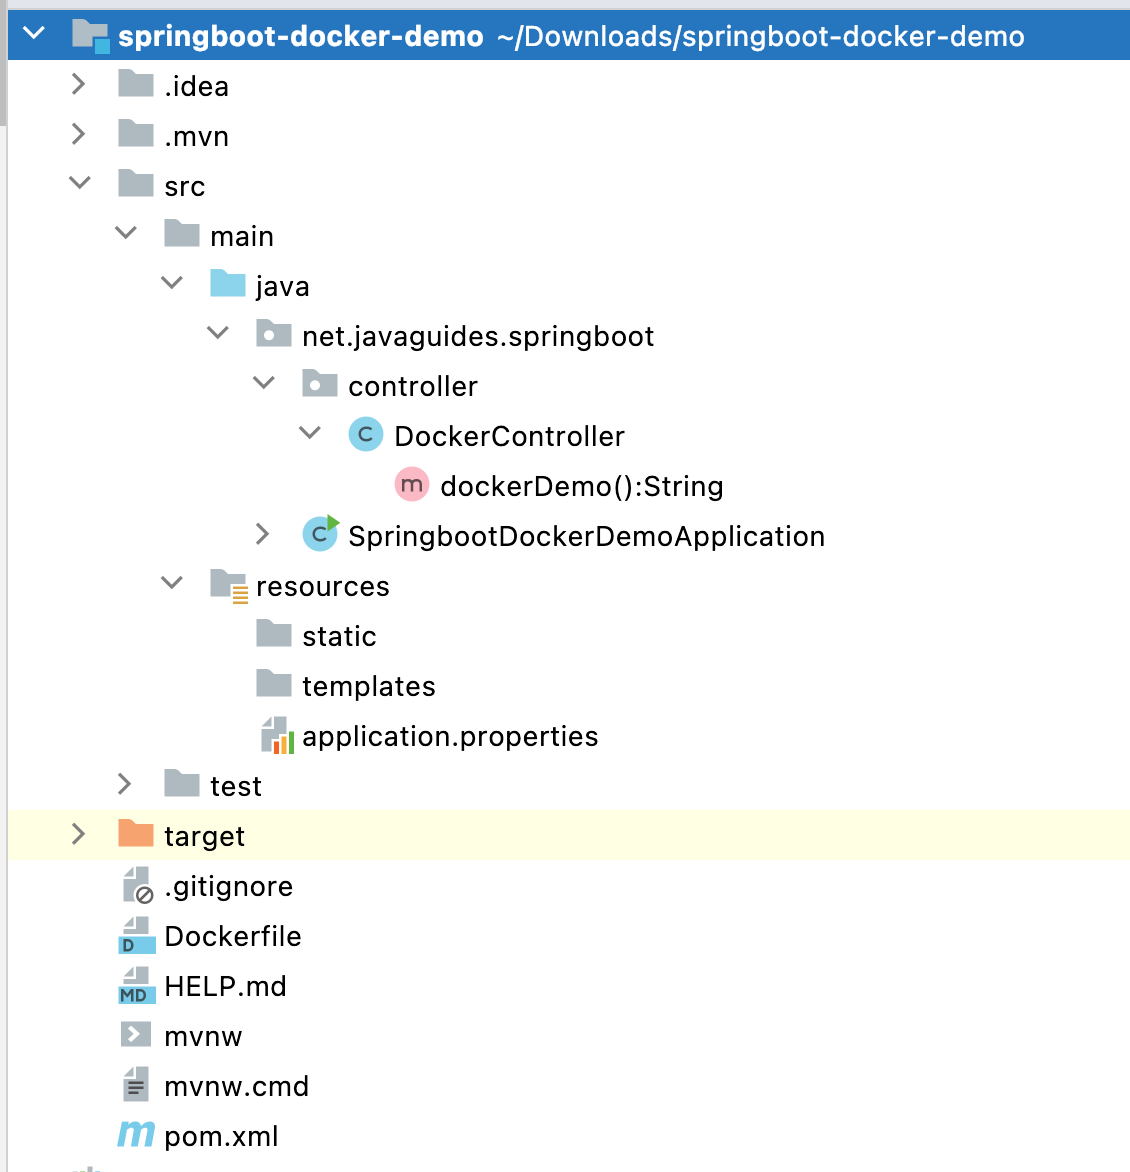
Build a simple REST API
package net.javaguides.springboot.controller;

import org.springframework.web.bind.annotation.GetMapping;
import org.springframework.web.bind.annotation.RestController;

@RestController
public class DockerController {

    @GetMapping("/docker")
    public String dockerDemo(){
        return "Dockerizing Spring Boot Application";
    }
}
Use the following command to maven build this project:mvn clean package
Once maven builds success, go target folder and you will be able to see the springboot-docker-demo-0.0.1-SNAPSHOT.jar generated:

Create Dockerfile
mvn clean package
FROM eclipse-temurin:17

LABEL mentainer="javaguides.net@gmail.com"

WORKDIR /app

COPY target/springboot-docker-demo-0.0.1-SNAPSHOT.jar /app/springboot-docker-demo.jar

ENTRYPOINT ["java", "-jar", "springboot-docker-demo.jar"]
FROM: A docker image can use another image available in the docker registry as its base or parent image. In the above example, we use the openjdk:11 image as our base image.
LABEL: The LABEL instruction is used to add metadata to the image. In the above Dockerfile, we have added some info about the maintainer of the image through LABEL instruction.
WORKDIR: This instruction creates a working directory in a docker container.COPY: The COPY instruction copies new files or directories and adds them to the filesystem of the container at the path.
ENTRYPOINT: This is where you configure how the application is executed inside the container.
Build Docker Image
Now that we have defined the Dockerfile, let’s build a docker image for our application.
Before building the docker image, you need to make sure that you’ve packaged the application in the form of a jar file using maven.
Let’s now build the docker image by typing the following command:
docker build -t springboot-docker-demo .The file path . defines the location of the Dockerfile in the current directory, and the -t argument tags the resulting image, where the repository name is the springboot-docker-demo and the tag is the latest.
docker imagesOutput:
rameshfadatare@Rameshs-MacBook-Air springboot-docker-demo % docker images
REPOSITORY               TAG       IMAGE ID       CREATED          SIZE
springboot-docker-demo   latest    8d61ab5ecfb1   36 seconds ago   667MB
docker-demo              latest    09c04b790f98   3 hours ago      667MB
Run Docker Image in a Container
docker run -p 8080:8080 springboot-docker-demoRunning the docker image in the background, in detached mode. You can use the -d option in the docker run command to run the container in the background -
docker run -d -p 8080:8080 springboot-docker-demoThe above command starts the container in the background and gives you the container ID.
You can see the list of all containers running in your system using the following command:
docker container lsDemo
Dockerizing Spring Boot ApplicationConclusion
docker build -t springboot-docker-demo .docker imagesdocker run -p 8080:8080 springboot-docker-demo docker run -d -p 8080:8080 springboot-docker-demodocker container lsMy Top and Bestseller Udemy Courses. The sale is going on with a 70 - 80% discount. The discount coupon has been added to each course below:

Build REST APIs with Spring Boot 4, Spring Security 7, and JWT
![[NEW] Learn Apache Maven with IntelliJ IDEA and Java 25](https://img-c.udemycdn.com/course/750x422/6852721_b512_2.jpg "[NEW] Learn Apache Maven with IntelliJ IDEA and Java 25")
[NEW] Learn Apache Maven with IntelliJ IDEA and Java 25

ChatGPT + Generative AI + Prompt Engineering for Beginners
")
Spring 7 and Spring Boot 4 for Beginners (Includes 8 Projects)
Available in Udemy for Business

Building Real-Time REST APIs with Spring Boot - Blog App
Available in Udemy for Business

Building Microservices with Spring Boot and Spring Cloud
Available in Udemy for Business

Java Full-Stack Developer Course with Spring Boot and React JS
Available in Udemy for Business

Build 5 Spring Boot Projects with Java: Line-by-Line Coding

Testing Spring Boot Application with JUnit and Mockito
Available in Udemy for Business

Spring Boot Thymeleaf Real-Time Web Application - Blog App
Available in Udemy for Business

Master Spring Data JPA with Hibernate
Available in Udemy for Business

Spring Boot + Apache Kafka Course - The Practical Guide
Available in Udemy for Business


")

Comments
Post a Comment
Leave Comment