
🎓 Check Out My Top 25 Udemy Courses (80-90% Discount): My Udemy Courses - Ramesh Fadatare
In this tutorial, we will discuss how to integrate MariaDB in Spring boot applications. We will develop CRUD Rest web services using Spring boot with MariaDB and finally, we will test it using Postman Client.
This tutorial has upgraded to Spring Boot 3 and Java 17.
Learn and master Spring Boot at https://www.javaguides.net/p/spring-boot-tutorial.html
Learn and master Spring boot using video tutorials at https://www.youtube.com/c/JavaGuides
Check out my bestseller Udemcy courses:
- Building Real-Time REST APIs with Spring Boot and Deploy on AWS Cloud
- Testing Spring Boot Application with JUnit and Mockito (Includes Testcontainers)
- Learn Spring Data JPA with Hibernate: The Masterclass
MariaDB Database Overview
MariaDB is a popular fork of MySQL created by MySQL's original developers. It grew out of concerns related to MySQL's acquisition by Oracle. It offers support for both small data processing tasks and enterprise needs. It aims to be a drop-in replacement for MySQL requiring only a simple uninstall of MySQL and an install of MariaDB. MariaDB offers the same features as MySQL and much more.Key Features of MariaDB
The important features of MariaDB are −
- All of MariaDB is under GPL, LGPL, or BSD.
- MariaDB includes a wide selection of storage engines, including high-performance storage engines, for working with other RDBMS data sources.
- MariaDB uses a standard and popular querying language.
- MariaDB runs on a number of operating systems and supports a wide variety of programming languages.
- MariaDB offers support for PHP, one of the most popular web development languages.
- MariaDB offers Galera cluster technology.
- MariaDB also offers many operations and commands unavailable in MySQL and eliminates/replaces features impacting performance negatively.
Complete Spring Boot MariaDB CRUD Example
In our example application, we will perform CRUD operations on an Employee entity. We develop CRUD Rest web services using Spring boot and database as MariaDB. Finally, we will test it using Postman Client.MariaDB Configuration
Before configuring MariaDB in the Spring boot project, first, you need to create a database in the MariaDB server.For this tutorial, I’m using MariaDB installed locally on my laptop. You’ll need to have a database defined for your use.
Use the following command to log into MariaDB:
mysql -u root
Once you are logged in, use the following command to create a database.
create database springboot_demo;MariaDB Dependencies
Let's add the MariaDB database driver that is mariadb-java-client as a dependency to our project.
       <!-- https://mvnrepository.com/artifact/org.mariadb.jdbc/mariadb-java-client -->
        <dependency>
            <groupId>org.mariadb.jdbc</groupId>
            <artifactId>mariadb-java-client</artifactId>
            <version>2.5.2</version>
       </dependency>
Make sure to add below Maven dependencies:
        <dependency>
            <groupId>org.springframework.boot</groupId>
            <artifactId>spring-boot-starter-web</artifactId>
        </dependency>
        <dependency>
            <groupId>org.springframework.boot</groupId>
            <artifactId>spring-boot-starter-data-jpa</artifactId>
        </dependency>
        <dependency>
             <groupId>org.springframework.boot</groupId>
            <artifactId>spring-boot-starter-validation</artifactId>
        </dependency>
        <dependency>
            <groupId>org.mariadb.jdbc</groupId>
            <artifactId>mariadb-java-client</artifactId>
            <version>2.5.2</version>
        </dependency>
MariaDB Configuration in Spring Boot Project
The following properties are required to configure MariaDB with Spring Boot.
In your Spring boot project, open the application.properties file and add the following properties to configure the MariaDB database.
spring.datasource.url=jdbc:mariadb://localhost:3306/springboot_demo
spring.datasource.username=root
spring.datasource.password=root
spring.datasource.driver-class-name=org.mariadb.jdbc.Driver
spring.jpa.hibernate.ddl-auto=create-drop
You don’t need to create any tables. The employees table will automatically be created by the Hibernate from the Employee entity that we will define in the next step.
Create JPA Entity - Employee.java
Let's create an Employee Jpa entity with the following fields:
- id - primary key
- firstName - Employee first name
- lastName - Employee last name
- emailId - Employee email address
package net.guides.springboot2.springboot2jpacrudexample.model;

import jakarta.persistence.*;

@Entity
@Table(name = "employees")
public class Employee {

    private long id;
    private String firstName;
    private String lastName;
    private String emailId;

    public Employee() {

    }

    public Employee(String firstName, String lastName, String emailId) {
        this.firstName = firstName;
        this.lastName = lastName;
        this.emailId = emailId;
    }

    @Id
    @GeneratedValue(strategy = GenerationType.AUTO)
    public long getId() {
        return id;
    }
    public void setId(long id) {
        this.id = id;
    }

    @Column(name = "first_name", nullable = false)
    public String getFirstName() {
        return firstName;
    }
    public void setFirstName(String firstName) {
        this.firstName = firstName;
    }

    @Column(name = "last_name", nullable = false)
    public String getLastName() {
        return lastName;
    }
    public void setLastName(String lastName) {
        this.lastName = lastName;
    }

    @Column(name = "email_address", nullable = false)
    public String getEmailId() {
        return emailId;
    }
    public void setEmailId(String emailId) {
        this.emailId = emailId;
    }
}
All your domain models must be annotated with @Entity annotation. It is used to mark the class as a persistent Java class.
@Table annotation is used to provide the details of the table that this entity will be mapped to.
@Id annotation is used to define the primary key.
@GeneratedValue annotation is used to define the primary key generation strategy. In the above case, we have declared the primary key to be an Auto Increment field.
@Column annotation is used to define the properties of the column that will be mapped to the annotated field. You can define several properties like name, length, nullable, updateable, etc.
Create a Spring Data Repository - EmployeeRepository.java
Let's create an EmployeeRepository to access Employee's data from the database.
Well, Spring Data JPA comes with a JpaRepository interface which defines methods for all the CRUD operations on the entity, and a default implementation of JpaRepository called SimpleJpaRepository
package net.guides.springboot2.springboot2jpacrudexample.repository;

import org.springframework.data.jpa.repository.JpaRepository;
import org.springframework.stereotype.Repository;

import net.guides.springboot2.springboot2jpacrudexample.model.Employee;

@Repository
public interface EmployeeRepository extends JpaRepository<Employee, Long>{

}
9. Create Spring Rest Controller - EmployeeController.java
Let's create the REST APIs for creating, retrieving, updating, and deleting an Employee:
import java.util.HashMap;

import java.util.List;
import java.util.Map;

import jakarta.validation.Valid;

import org.springframework.beans.factory.annotation.Autowired;
import org.springframework.http.ResponseEntity;
import org.springframework.web.bind.annotation.CrossOrigin;
import org.springframework.web.bind.annotation.DeleteMapping;
import org.springframework.web.bind.annotation.GetMapping;
import org.springframework.web.bind.annotation.PathVariable;
import org.springframework.web.bind.annotation.PostMapping;
import org.springframework.web.bind.annotation.PutMapping;
import org.springframework.web.bind.annotation.RequestBody;
import org.springframework.web.bind.annotation.RequestMapping;
import org.springframework.web.bind.annotation.RestController;

import net.guides.springboot2.springboot2jpacrudexample.exception.ResourceNotFoundException;
import net.guides.springboot2.springboot2jpacrudexample.model.Employee;
import net.guides.springboot2.springboot2jpacrudexample.repository.EmployeeRepository;

@RestController
@RequestMapping("/api/v1")
public class EmployeeController {
    @Autowired
    private EmployeeRepository employeeRepository;

    @GetMapping("/employees")
    public List < Employee > getAllEmployees() {
        return employeeRepository.findAll();
    }

    @GetMapping("/employees/{id}")
    public ResponseEntity < Employee > getEmployeeById(@PathVariable(value = "id") Long employeeId)
    throws ResourceNotFoundException {
        Employee employee = employeeRepository.findById(employeeId)
            .orElseThrow(() -> new ResourceNotFoundException("Employee not found for this id :: " + employeeId));
        return ResponseEntity.ok().body(employee);
    }

    @PostMapping("/employees")
    public Employee createEmployee(@Valid @RequestBody Employee employee) {
        return employeeRepository.save(employee);
    }

    @PutMapping("/employees/{id}")
    public ResponseEntity < Employee > updateEmployee(@PathVariable(value = "id") Long employeeId,
        @Valid @RequestBody Employee employeeDetails) throws ResourceNotFoundException {
        Employee employee = employeeRepository.findById(employeeId)
            .orElseThrow(() -> new ResourceNotFoundException("Employee not found for this id :: " + employeeId));

        employee.setEmailId(employeeDetails.getEmailId());
        employee.setLastName(employeeDetails.getLastName());
        employee.setFirstName(employeeDetails.getFirstName());
        final Employee updatedEmployee = employeeRepository.save(employee);
        return ResponseEntity.ok(updatedEmployee);
    }

    @DeleteMapping("/employees/{id}")
    public Map < String, Boolean > deleteEmployee(@PathVariable(value = "id") Long employeeId)
    throws ResourceNotFoundException {
        Employee employee = employeeRepository.findById(employeeId)
            .orElseThrow(() -> new ResourceNotFoundException("Employee not found for this id :: " + employeeId));

        employeeRepository.delete(employee);
        Map < String, Boolean > response = new HashMap < > ();
        response.put("deleted", Boolean.TRUE);
        return response;
    }
}
Exception(Error) Handling for RESTful Services
Spring Boot provides a good default implementation for exception handling for RESTful Services. Let’s quickly look at the default Exception Handling features provided by Spring Boot.
Resource Not Present
Here's what happens when you fire a request to not resource found: http://localhost:8080/some-dummy-url
{
  "timestamp": 1512713804164,
  "status": 404,
  "error": "Not Found",
  "message": "No message available",
  "path": "/some-dummy-url"
}
That's a cool error response. It contains all the details that are typically needed.
What happens when we throw an Exception?
Let’s see what Spring Boot does when an exception is thrown from a Resource. we can specify the Response Status for a specific exception along with the definition of the Exception of ‘@ResponseStatus’ annotation.
Let's create a ResourceNotFoundException.java class.
import org.springframework.http.HttpStatus;
import org.springframework.web.bind.annotation.ResponseStatus;

@ResponseStatus(value = HttpStatus.NOT_FOUND)
public class ResourceNotFoundException extends Exception{

    private static final long serialVersionUID = 1L;

    public ResourceNotFoundException(String message){
        super(message);
    }
}
Customizing Error Response Structure
The default error response provided by Spring Boot contains all the details that are typically needed.
However, you might want to create a framework independent response structure for your organization. In that case, you can define a specific error response structure.
Let’s define a simple error response bean.
import java.util.Date;

public class ErrorDetails {
    private Date timestamp;
    private String message;
    private String details;

    public ErrorDetails(Date timestamp, String message, String details) {
         super();
         this.timestamp = timestamp;
         this.message = message;
         this.details = details;
    }

    public Date getTimestamp() {
         return timestamp;
    }

    public String getMessage() {
         return message;
    }

    public String getDetails() {
         return details;
    }
}
To use ErrorDetails to return the error response, let’s create a GlobalExceptionHandler class annotated with @ControllerAdvice annotation. This class handles exception-specific and global exceptions in a single place.
import java.util.Date;

import org.springframework.http.HttpStatus;
import org.springframework.http.ResponseEntity;
import org.springframework.web.bind.annotation.ControllerAdvice;
import org.springframework.web.bind.annotation.ExceptionHandler;
import org.springframework.web.context.request.WebRequest;

@ControllerAdvice
public class GlobalExceptionHandler {
    @ExceptionHandler(ResourceNotFoundException.class)
    public ResponseEntity<?> resourceNotFoundException(ResourceNotFoundException ex, WebRequest request) {
         ErrorDetails errorDetails = new ErrorDetails(new Date(), ex.getMessage(), request.getDescription(false));
         return new ResponseEntity<>(errorDetails, HttpStatus.NOT_FOUND);
    }

    @ExceptionHandler(Exception.class)
    public ResponseEntity<?> globleExcpetionHandler(Exception ex, WebRequest request) {
        ErrorDetails errorDetails = new ErrorDetails(new Date(), ex.getMessage(), request.getDescription(false));
        return new ResponseEntity<>(errorDetails, HttpStatus.INTERNAL_SERVER_ERROR);
    }
}
Running Application
This spring boot application has an entry point Java class called Application.java with the public static void main(String[] args) method, which you can run to start the application.
import org.springframework.boot.SpringApplication;

import org.springframework.boot.autoconfigure.SpringBootApplication;

@SpringBootApplication
public class Application {

    public static void main(String[] args) {
        SpringApplication.run(Application.class, args);
    }
}
@SpringBootApplication is a convenience annotation that adds all of the following:
- @Configuration tags the class as a source of bean definitions for the application context.
- @EnableAutoConfiguration tells Spring Boot to start adding beans based on classpath settings, other beans, and various property settings.
- Normally you would add @EnableWebMvc for a Spring MVC app, but Spring Boot adds it automatically when it sees spring-webmvc on the classpath. This flags the application as a web application and activates key behaviors such as setting up a DispatcherServlet.
- @ComponentScan tells Spring to look for other components, configurations, and services in the hello package, allowing it to find the controllers.
The main() method uses Spring Boot’s SpringApplication.run() method to launch an application.
>> Spring Boot 2 REST APIs Integration Testing
Integration Testing for REST APIs
There is a separate beautiful article for integration testing for REST APIs on:>> Spring Boot 2 REST APIs Integration Testing
Testing REST APIs via Postman Client
1. Create Employee REST API
HTTP Method: POST
Request URL: http://localhost:8080/api/v1/employees

Note that request and response JSON in the above diagram, the response contains a database auto-generated id.
2. Get Employee by ID REST API
HTTP Method: GET
Request URL: http://localhost:8080/api/v1/employees/11


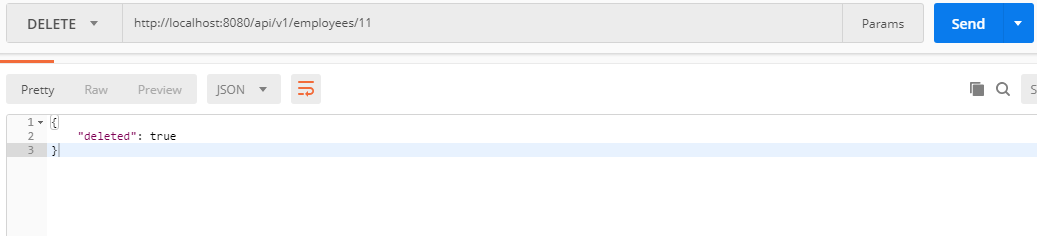
5. Delete Employee REST API
HTTP Method: DELETE
Request URL: http://localhost:8080/api/v1/employees/11
Check out My bestseller Udemy Courses
My Top and Bestseller Udemy Courses. The sale is going on with a 70 - 80% discount. The discount coupon has been added to each course below:

Build REST APIs with Spring Boot 4, Spring Security 7, and JWT
🆕 High-Demand
80–90% OFF
![[NEW] Learn Apache Maven with IntelliJ IDEA and Java 25](https://img-c.udemycdn.com/course/750x422/6852721_b512_2.jpg "[NEW] Learn Apache Maven with IntelliJ IDEA and Java 25")
[NEW] Learn Apache Maven with IntelliJ IDEA and Java 25
🆕 High-Demand
80–90% OFF

ChatGPT + Generative AI + Prompt Engineering for Beginners
🚀 Trending Now
80–90% OFF
")
Spring 7 and Spring Boot 4 for Beginners (Includes 8 Projects)
🔥 Bestseller
80–90% OFF
Available in Udemy for Business
Available in Udemy for Business

Building Real-Time REST APIs with Spring Boot - Blog App
🔥 Bestseller
80–90% OFF
Available in Udemy for Business
Available in Udemy for Business

Building Microservices with Spring Boot and Spring Cloud
🌟 Top Rated
80–90% OFF
Available in Udemy for Business
Available in Udemy for Business

Java Full-Stack Developer Course with Spring Boot and React JS
🔥 Bestseller
80–90% OFF
Available in Udemy for Business
Available in Udemy for Business

Build 5 Spring Boot Projects with Java: Line-by-Line Coding
🌟 Top Rated
80–90% OFF

Testing Spring Boot Application with JUnit and Mockito
🔥 Bestseller
80–90% OFF
Available in Udemy for Business
Available in Udemy for Business

Spring Boot Thymeleaf Real-Time Web Application - Blog App
🔥 Bestseller
80–90% OFF
Available in Udemy for Business
Available in Udemy for Business

Master Spring Data JPA with Hibernate
🔥 Bestseller
80–90% OFF
Available in Udemy for Business
Available in Udemy for Business

Spring Boot + Apache Kafka Course - The Practical Guide
🎓 Student Favorite
80–90% OFF
Available in Udemy for Business
Available in Udemy for Business


")

It looks like that class was deleted for Spring Boot 2.0.0.RC1. They expect you to use different exceptions for this namely InvalidConfigurationPropertyValueException.
ReplyDelete