
🎓 Top 15 Udemy Courses (80-90% Discount): My Udemy Courses - Ramesh Fadatare — All my Udemy courses are real-time and project oriented courses.
▶️ Subscribe to My YouTube Channel (178K+ subscribers): Java Guides on YouTube
▶️ For AI, ChatGPT, Web, Tech, and Generative AI, subscribe to another channel: Ramesh Fadatare on YouTube
In this tutorial, we will learn how to create a web application in Java using Servlets and JSPs.
Java Web Application is used to create dynamic websites. Java provides support for web application through Servlets and JSPs. We can create a website with static HTML pages but when we want the information to be dynamic, we need a web application.

5. Make sure that the target runtime is set to Apache Tomcat with the currently supported version.


Java Web Application is used to create dynamic websites. Java provides support for web application through Servlets and JSPs. We can create a website with static HTML pages but when we want the information to be dynamic, we need a web application.
In this tutorial, we are building a simple User Management web application that manages a collection of users with the basic feature: list, insert, update, delete (or CURD operations - Create, Update, Read and Delete).
You can download the source code of this tutorial from my GitHub repository and the link is given at the end of this tutorial.
Top JSP, Servlet and JDBC Tutorials:
Check out Build Todo App using JSP, Servlet, JDBC, and MySQL.
Video Tutorial
This tutorial explained very well in below youtube video. Subscribe to our youtube channel for more future video updates.
We will develop below simple basic features in our User Management web application:
- Create a User
- Update a User
- Delete a User
- Retrieve a User
- List of all Users
The application looks something like this:

Tools and technologies used
- JSP - 2.2 +
- IDE - STS/Eclipse Neon.3
- JDK - 1.8 or later
- Apache Tomcat - 8.5
- JSTL - 1.2.1
- Servlet API - 2.5
- MySQL - mysql-connector-java-8.0.13.jar
Development Steps
- Create an Eclipse Dynamic Web Project
- Add Dependencies
- Project Structure
- MySQL Database Setup
- Create a JavaBean - User.java
- Create a UserDAO.java
- Create a UserServlet.java
- Creating User Listing JSP Page - user-list.jsp
- Create a User Form JSP Page - user-form.jsp
- Creating Error JSP page
- Deploying and Testing the Application Demo
Class Diagram
Here is the class diagram of the User Management web application that we are going to develop in this tutorial:


1. Create an Eclipse Dynamic Web Project
To create a new dynamic Web project in Eclipse:
1. On the main menu select File > New > Project....
2. In the upcoming wizard choose Web > Dynamic Web Project.
3. Click Next.
4. Enter project name as "jsp-servlet-jdbc-mysql-example";5. Make sure that the target runtime is set to Apache Tomcat with the currently supported version.
2. Add Dependencies
Add the latest release of below jar files to the lib folder.
- jsp-api.2.3.1.jar
- servlet-api.2.3.jar
- mysql-connector-java-8.0.13.jar
- jstl-1.2.jar
3. Project Structure
Standard project structure for your reference -
4. MySQL Database Setup
Let's create a database named "demo" in MySQL. Now, create a users table using below DDL script:
CREATE DATABASE 'demo';
USE demo;

create table users (
 id  int(3) NOT NULL AUTO_INCREMENT,
 name varchar(120) NOT NULL,
 email varchar(220) NOT NULL,
 country varchar(120),
 PRIMARY KEY (id)
);
You can use either MySQL Command Line Client or MySQL Workbench tool to create the database. The above a users table looks like:
5. Create a JavaBean - User.java
Let's create a User java class to model a user entity in the database with the following code:
package net.javaguides.usermanagement.model;

/**
 * User.java
 * This is a model class represents a User entity
 * @author Ramesh Fadatare
 *
 */
public class User {
    protected int id;
    protected String name;
    protected String email;
    protected String country;

    public User() {}

    public User(String name, String email, String country) {
        super();
        this.name = name;
        this.email = email;
        this.country = country;
    }

    public User(int id, String name, String email, String country) {
        super();
        this.id = id;
        this.name = name;
        this.email = email;
        this.country = country;
    }

    public int getId() {
        return id;
    }
    public void setId(int id) {
        this.id = id;
    }
    public String getName() {
        return name;
    }
    public void setName(String name) {
        this.name = name;
    }
    public String getEmail() {
        return email;
    }
    public void setEmail(String email) {
        this.email = email;
    }
    public String getCountry() {
        return country;
    }
    public void setCountry(String country) {
        this.country = country;
    }
}
6. Create a UserDAO.java
Let's create a UserDAO class which is a Data Access Layer (DAO) class that provides CRUD (Create, Read, Update, Delete) operations for the table users in a database. Here’s the full source code of the UserDAO:
package net.javaguides.usermanagement.dao;

import java.sql.Connection;
import java.sql.DriverManager;
import java.sql.PreparedStatement;
import java.sql.ResultSet;
import java.sql.SQLException;
import java.util.ArrayList;
import java.util.List;

import net.javaguides.usermanagement.model.User;

/**
 * AbstractDAO.java This DAO class provides CRUD database operations for the
 * table users in the database.
 *
 * @author Ramesh Fadatare
 *
 */
public class UserDAO {
    private String jdbcURL = "jdbc:mysql://localhost:3306/demo?useSSL=false";
    private String jdbcUsername = "root";
    private String jdbcPassword = "root";

    private static final String INSERT_USERS_SQL = "INSERT INTO users" + "  (name, email, country) VALUES " +
        " (?, ?, ?);";

    private static final String SELECT_USER_BY_ID = "select id,name,email,country from users where id =?";
    private static final String SELECT_ALL_USERS = "select * from users";
    private static final String DELETE_USERS_SQL = "delete from users where id = ?;";
    private static final String UPDATE_USERS_SQL = "update users set name = ?,email= ?, country =? where id = ?;";

    public UserDAO() {}

    protected Connection getConnection() {
        Connection connection = null;
        try {
            Class.forName("com.mysql.jdbc.Driver");
            connection = DriverManager.getConnection(jdbcURL, jdbcUsername, jdbcPassword);
        } catch (SQLException e) {
            // TODO Auto-generated catch block
            e.printStackTrace();
        } catch (ClassNotFoundException e) {
            // TODO Auto-generated catch block
            e.printStackTrace();
        }
        return connection;
    }

    public void insertUser(User user) throws SQLException {
        System.out.println(INSERT_USERS_SQL);
        // try-with-resource statement will auto close the connection.
        try (Connection connection = getConnection(); PreparedStatement preparedStatement = connection.prepareStatement(INSERT_USERS_SQL)) {
            preparedStatement.setString(1, user.getName());
            preparedStatement.setString(2, user.getEmail());
            preparedStatement.setString(3, user.getCountry());
            System.out.println(preparedStatement);
            preparedStatement.executeUpdate();
        } catch (SQLException e) {
            printSQLException(e);
        }
    }

    public User selectUser(int id) {
        User user = null;
        // Step 1: Establishing a Connection
        try (Connection connection = getConnection();
            // Step 2:Create a statement using connection object
            PreparedStatement preparedStatement = connection.prepareStatement(SELECT_USER_BY_ID);) {
            preparedStatement.setInt(1, id);
            System.out.println(preparedStatement);
            // Step 3: Execute the query or update query
            ResultSet rs = preparedStatement.executeQuery();

            // Step 4: Process the ResultSet object.
            while (rs.next()) {
                String name = rs.getString("name");
                String email = rs.getString("email");
                String country = rs.getString("country");
                user = new User(id, name, email, country);
            }
        } catch (SQLException e) {
            printSQLException(e);
        }
        return user;
    }

    public List < User > selectAllUsers() {

        // using try-with-resources to avoid closing resources (boiler plate code)
        List < User > users = new ArrayList < > ();
        // Step 1: Establishing a Connection
        try (Connection connection = getConnection();

            // Step 2:Create a statement using connection object
            PreparedStatement preparedStatement = connection.prepareStatement(SELECT_ALL_USERS);) {
            System.out.println(preparedStatement);
            // Step 3: Execute the query or update query
            ResultSet rs = preparedStatement.executeQuery();

            // Step 4: Process the ResultSet object.
            while (rs.next()) {
                int id = rs.getInt("id");
                String name = rs.getString("name");
                String email = rs.getString("email");
                String country = rs.getString("country");
                users.add(new User(id, name, email, country));
            }
        } catch (SQLException e) {
            printSQLException(e);
        }
        return users;
    }

    public boolean deleteUser(int id) throws SQLException {
        boolean rowDeleted;
        try (Connection connection = getConnection(); PreparedStatement statement = connection.prepareStatement(DELETE_USERS_SQL);) {
            statement.setInt(1, id);
            rowDeleted = statement.executeUpdate() > 0;
        }
        return rowDeleted;
    }

    public boolean updateUser(User user) throws SQLException {
        boolean rowUpdated;
        try (Connection connection = getConnection(); PreparedStatement statement = connection.prepareStatement(UPDATE_USERS_SQL);) {
            statement.setString(1, user.getName());
            statement.setString(2, user.getEmail());
            statement.setString(3, user.getCountry());
            statement.setInt(4, user.getId());

            rowUpdated = statement.executeUpdate() > 0;
        }
        return rowUpdated;
    }

    private void printSQLException(SQLException ex) {
        for (Throwable e: ex) {
            if (e instanceof SQLException) {
                e.printStackTrace(System.err);
                System.err.println("SQLState: " + ((SQLException) e).getSQLState());
                System.err.println("Error Code: " + ((SQLException) e).getErrorCode());
                System.err.println("Message: " + e.getMessage());
                Throwable t = ex.getCause();
                while (t != null) {
                    System.out.println("Cause: " + t);
                    t = t.getCause();
                }
            }
        }
    }
}
7. Create a UserServlet.java
Now, let's create UserServlet that acts as a page controller to handle all requests from the client. Let’s look at the code first:
package net.javaguides.usermanagement.web;

import java.io.IOException;
import java.sql.SQLException;
import java.util.List;

import javax.servlet.RequestDispatcher;
import javax.servlet.ServletException;
import javax.servlet.annotation.WebServlet;
import javax.servlet.http.HttpServlet;
import javax.servlet.http.HttpServletRequest;
import javax.servlet.http.HttpServletResponse;

import net.javaguides.usermanagement.dao.UserDAO;
import net.javaguides.usermanagement.model.User;

/**
 * ControllerServlet.java
 * This servlet acts as a page controller for the application, handling all
 * requests from the user.
 * @email Ramesh Fadatare
 */

@WebServlet("/")
public class UserServlet extends HttpServlet {
    private static final long serialVersionUID = 1 L;
    private UserDAO userDAO;

    public void init() {
        userDAO = new UserDAO();
    }

    protected void doPost(HttpServletRequest request, HttpServletResponse response)
    throws ServletException, IOException {
        doGet(request, response);
    }

    protected void doGet(HttpServletRequest request, HttpServletResponse response)
    throws ServletException, IOException {
        String action = request.getServletPath();

        try {
            switch (action) {
                case "/new":
                    showNewForm(request, response);
                    break;
                case "/insert":
                    insertUser(request, response);
                    break;
                case "/delete":
                    deleteUser(request, response);
                    break;
                case "/edit":
                    showEditForm(request, response);
                    break;
                case "/update":
                    updateUser(request, response);
                    break;
                default:
                    listUser(request, response);
                    break;
            }
        } catch (SQLException ex) {
            throw new ServletException(ex);
        }
    }

    private void listUser(HttpServletRequest request, HttpServletResponse response)
    throws SQLException, IOException, ServletException {
        List < User > listUser = userDAO.selectAllUsers();
        request.setAttribute("listUser", listUser);
        RequestDispatcher dispatcher = request.getRequestDispatcher("user-list.jsp");
        dispatcher.forward(request, response);
    }

    private void showNewForm(HttpServletRequest request, HttpServletResponse response)
    throws ServletException, IOException {
        RequestDispatcher dispatcher = request.getRequestDispatcher("user-form.jsp");
        dispatcher.forward(request, response);
    }

    private void showEditForm(HttpServletRequest request, HttpServletResponse response)
    throws SQLException, ServletException, IOException {
        int id = Integer.parseInt(request.getParameter("id"));
        User existingUser = userDAO.selectUser(id);
        RequestDispatcher dispatcher = request.getRequestDispatcher("user-form.jsp");
        request.setAttribute("user", existingUser);
        dispatcher.forward(request, response);

    }

    private void insertUser(HttpServletRequest request, HttpServletResponse response)
    throws SQLException, IOException {
        String name = request.getParameter("name");
        String email = request.getParameter("email");
        String country = request.getParameter("country");
        User newUser = new User(name, email, country);
        userDAO.insertUser(newUser);
        response.sendRedirect("list");
    }

    private void updateUser(HttpServletRequest request, HttpServletResponse response)
    throws SQLException, IOException {
        int id = Integer.parseInt(request.getParameter("id"));
        String name = request.getParameter("name");
        String email = request.getParameter("email");
        String country = request.getParameter("country");

        User book = new User(id, name, email, country);
        userDAO.updateUser(book);
        response.sendRedirect("list");
    }

    private void deleteUser(HttpServletRequest request, HttpServletResponse response)
    throws SQLException, IOException {
        int id = Integer.parseInt(request.getParameter("id"));
        userDAO.deleteUser(id);
        response.sendRedirect("list");

    }
}
8. Creating User Listing JSP Page - user-list.jsp
Next, create a JSP page for displaying all users from the database. Let's create a list-user.jsp page under the WebContent directory in the project with the following code:
<%@ page language="java" contentType="text/html; charset=UTF-8" pageEncoding="UTF-8"%> <%@ taglib uri="http://java.sun.com/jsp/jstl/core" prefix="c"%> <html> <head> <title>User Management Application</title> <link rel="stylesheet" href="https://stackpath.bootstrapcdn.com/bootstrap/4.3.1/css/bootstrap.min.css" integrity="sha384-ggOyR0iXCbMQv3Xipma34MD+dH/1fQ784/j6cY/iJTQUOhcWr7x9JvoRxT2MZw1T" crossorigin="anonymous"> </head> <body> <header> <nav class="navbar navbar-expand-md navbar-dark" style="background-color: tomato"> <div> <a href="https://www.javaguides.net" class="navbar-brand"> User Management App </a> </div> <ul class="navbar-nav"> <li><a href="<%=request.getContextPath()%>/list" class="nav-link">Users</a></li> </ul> </nav> </header> <br> <div class="row"> <!-- <div class="alert alert-success" *ngIf='message'>{{message}}</div> --> <div class="container"> <h3 class="text-center">List of Users</h3> <hr> <div class="container text-left"> <a href="<%=request.getContextPath()%>/new" class="btn btn-success">Add New User</a> </div> <br> <table class="table table-bordered"> <thead> <tr> <th>ID</th> <th>Name</th> <th>Email</th> <th>Country</th> <th>Actions</th> </tr> </thead> <tbody> <!-- for (Todo todo: todos) { --> <c:forEach var="user" items="${listUser}"> <tr> <td> <c:out value="${user.id}" /> </td> <td> <c:out value="${user.name}" /> </td> <td> <c:out value="${user.email}" /> </td> <td> <c:out value="${user.country}" /> </td> <td><a href="edit?id=<c:out value='${user.id}' />">Edit</a> <a href="delete?id=<c:out value='${user.id}' />">Delete</a></td> </tr> </c:forEach> <!-- } --> </tbody> </table> </div> </div> </body> </html>
Once you will deploy above JSP page in tomcat and open in the browser looks something like this:
9. Create a User Form JSP Page - user-form.jsp
Next, we create a JSP page for creating a new User called user-form.jsp. Here’s its full source code:
<%@ page language="java" contentType="text/html; charset=UTF-8"
 pageEncoding="UTF-8"%>
    <%@ taglib uri="http://java.sun.com/jsp/jstl/core" prefix="c"%>
        <html>

        <head>
            <title>User Management Application</title>
            <link rel="stylesheet" href="https://stackpath.bootstrapcdn.com/bootstrap/4.3.1/css/bootstrap.min.css" integrity="sha384-ggOyR0iXCbMQv3Xipma34MD+dH/1fQ784/j6cY/iJTQUOhcWr7x9JvoRxT2MZw1T" crossorigin="anonymous">
        </head>

        <body>

            <header>
                <nav class="navbar navbar-expand-md navbar-dark" style="background-color: tomato">
                    <div>
                        <a href="https://www.javaguides.net" class="navbar-brand"> User Management App </a>
                    </div>

                    <ul class="navbar-nav">
                        <li><a href="<%=request.getContextPath()%>/list" class="nav-link">Users</a></li>
                    </ul>
                </nav>
            </header>
            <br>
            <div class="container col-md-5">
                <div class="card">
                    <div class="card-body">
                        <c:if test="${user != null}">
                            <form action="update" method="post">
                        </c:if>
                        <c:if test="${user == null}">
                            <form action="insert" method="post">
                        </c:if>

                        <caption>
                            <h2>
                                <c:if test="${user != null}">
                                    Edit User
                                </c:if>
                                <c:if test="${user == null}">
                                    Add New User
                                </c:if>
                            </h2>
                        </caption>

                        <c:if test="${user != null}">
                            <input type="hidden" name="id" value="<c:out value='${user.id}' />" />
                        </c:if>

                        <fieldset class="form-group">
                            <label>User Name</label> <input type="text" value="<c:out value='${user.name}' />" class="form-control" name="name" required="required">
                        </fieldset>

                        <fieldset class="form-group">
                            <label>User Email</label> <input type="text" value="<c:out value='${user.email}' />" class="form-control" name="email">
                        </fieldset>

                        <fieldset class="form-group">
                            <label>User Country</label> <input type="text" value="<c:out value='${user.country}' />" class="form-control" name="country">
                        </fieldset>

                        <button type="submit" class="btn btn-success">Save</button>
                        </form>
                    </div>
                </div>
            </div>
        </body>

        </html>
Once you will deploy above JSP page in tomcat and open in the browser looks something like this:
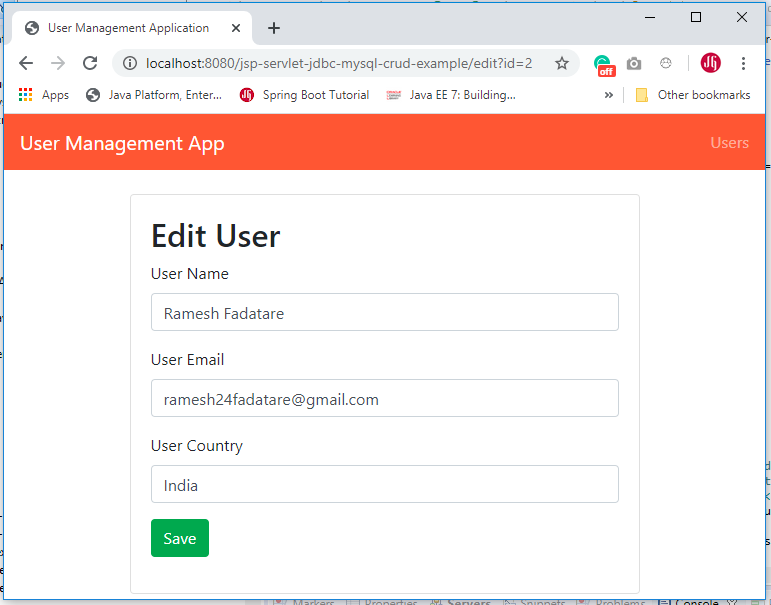
The above page acts for both functionalities to create a new User and Edit the same user. The edit page looks like:
10. Creating Error JSP page
Here’s the code of the Error.jsp page which simply shows the exception message:
<%@ page language="java" contentType="text/html; charset=UTF-8"
    pageEncoding="UTF-8" isErrorPage="true" %>
<!DOCTYPE html PUBLIC "-//W3C//DTD HTML 4.01 Transitional//EN"
 "http://www.w3.org/TR/html4/loose.dtd">
<html>
<head>
<title>Error</title>
</head>
<body>
 <center>
  <h1>Error</h1>
  <h2><%=exception.getMessage() %><br/> </h2>
 </center>
</body>
</html>
11. Deploying and Testing the Application
It's time to see a demo of the above User Management web application. Deploy this web application in tomcat server.
Type the following URL in your web browser to access the User Management application: http://localhost:8080/jsp-servlet-jdbc-mysql-crud-example/
Create a new User
Edit a User
List of all Users
GitHub Repository
The source code this tutorial (User Management) is available on my GitHub repository at https://github.com/RameshMF/jsp-servlet-jdbc-mysql-crud-tutorial.
Check out Build Todo App using JSP, Servlet, JDBC, and MySQL.
My Top and Bestseller Udemy Courses. The sale is going on with a 70 - 80% discount. The discount coupon has been added to each course below:

Build REST APIs with Spring Boot 4, Spring Security 7, and JWT
🆕 High-Demand
80–90% OFF
![[NEW] Learn Apache Maven with IntelliJ IDEA and Java 25](https://img-c.udemycdn.com/course/750x422/6852721_b512_2.jpg "[NEW] Learn Apache Maven with IntelliJ IDEA and Java 25")
[NEW] Learn Apache Maven with IntelliJ IDEA and Java 25
🆕 High-Demand
80–90% OFF

ChatGPT + Generative AI + Prompt Engineering for Beginners
🚀 Trending Now
80–90% OFF
")
Spring 7 and Spring Boot 4 for Beginners (Includes 8 Projects)
🔥 Bestseller
80–90% OFF
Available in Udemy for Business
Available in Udemy for Business

Building Real-Time REST APIs with Spring Boot - Blog App
🔥 Bestseller
80–90% OFF
Available in Udemy for Business
Available in Udemy for Business

Building Microservices with Spring Boot and Spring Cloud
🌟 Top Rated
80–90% OFF
Available in Udemy for Business
Available in Udemy for Business

Java Full-Stack Developer Course with Spring Boot and React JS
🔥 Bestseller
80–90% OFF
Available in Udemy for Business
Available in Udemy for Business

Build 5 Spring Boot Projects with Java: Line-by-Line Coding
🌟 Top Rated
80–90% OFF

Testing Spring Boot Application with JUnit and Mockito
🔥 Bestseller
80–90% OFF
Available in Udemy for Business
Available in Udemy for Business

Spring Boot Thymeleaf Real-Time Web Application - Blog App
🔥 Bestseller
80–90% OFF
Available in Udemy for Business
Available in Udemy for Business

Master Spring Data JPA with Hibernate
🔥 Bestseller
80–90% OFF
Available in Udemy for Business
Available in Udemy for Business

Spring Boot + Apache Kafka Course - The Practical Guide
🎓 Student Favorite
80–90% OFF
Available in Udemy for Business
Available in Udemy for Business


")

Very good example and good documentation
ReplyDelete