
🎓 Top 15 Udemy Courses (80-90% Discount): My Udemy Courses - Ramesh Fadatare — All my Udemy courses are real-time and project oriented courses.
▶️ Subscribe to My YouTube Channel (178K+ subscribers): Java Guides on YouTube
▶️ For AI, ChatGPT, Web, Tech, and Generative AI, subscribe to another channel: Ramesh Fadatare on YouTube
Overview
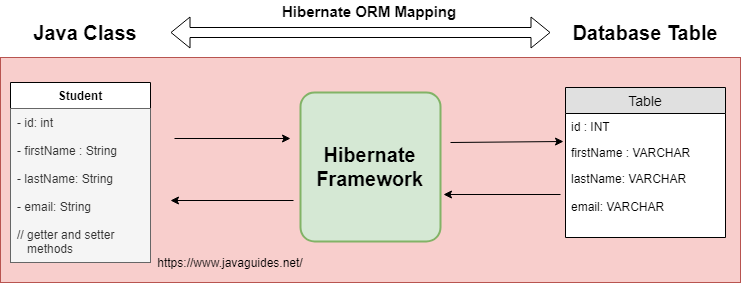
We will define a mapping between the Student Java class and a database table using the Hibernate ORM Framework.
The General Steps Needed to Integrate and Configure Hibernate
- Identify the POJOs that have a database representation.
- Identify which properties of those POJOs need to be persisted.
- Annotate each of the POJOs to map your Java object's properties to columns in a database table.
- Create the database schema using the schema export tool, use an existing database, or create your own database schema.
- Add the Hibernate Java libraries to your application’s classpath.
- Create a Hibernate XML configuration file that points to your database and your mapped classes.
- In your Java application, create a Hibernate Configuration object that references your XML configuration file.
- Also in your Java application, build a Hibernate SessionFactory object from the Configuration object.
- Retrieve the Hibernate Session objects from the SessionFactory, and write your data access logic for your application (create, retrieve, update, and delete).
Technologies and Tools Used
- Hibernate 6.1.7.Final
- Maven 3.5.3
- Java 17 or later
- MySQL 8.0.32
Let's start developing a Hibernate application step by step using Maven as a project management and build tool.
Development Steps
1. Create a Simple Maven Project
Use the How to Create a Simple Maven Project in Eclipse article to create a simple Maven project in Eclipse IDE.
2. Project Directory Structure
The project directory structure for your reference:

3. Add jar Dependencies to pom.xml
Add the required dependencies to the pom.xml file:
<dependency>
    <groupId>mysql</groupId>
    <artifactId>mysql-connector-java</artifactId>
    <version>8.0.32</version>
</dependency>
<dependency>
    <groupId>org.hibernate</groupId>
    <artifactId>hibernate-core</artifactId>
    <version>6.1.7.Final</version>
</dependency>
Here is the complete pom.xml file for your reference:
<project xmlns="http://maven.apache.org/POM/4.0.0"
         xmlns:xsi="http://www.w3.org/2001/XMLSchema-instance"
         xsi:schemaLocation="http://maven.apache.org/POM/4.0.0 http://maven.apache.org/xsd/maven-4.0.0.xsd">
    <modelVersion>4.0.0</modelVersion>
    <parent>
        <groupId>net.javaguides.hibernate</groupId>
        <artifactId>hibernate-tutorial</artifactId>
        <version>0.0.1-SNAPSHOT</version>
    </parent>
    <artifactId>hibernate-xml-config-example</artifactId>
    <properties>
        <project.build.sourceEncoding>UTF-8</project.build.sourceEncoding>
    </properties>
    <dependencies>
        <dependency>
            <groupId>mysql</groupId>
            <artifactId>mysql-connector-java</artifactId>
            <version>8.0.32</version>
        </dependency>
        <dependency>
            <groupId>org.hibernate</groupId>
            <artifactId>hibernate-core</artifactId>
            <version>6.1.7.Final</version>
        </dependency>
    </dependencies>
    <build>
        <sourceDirectory>src/main/java</sourceDirectory>
        <plugins>
            <plugin>
                <artifactId>maven-compiler-plugin</artifactId>
                <version>3.5.1</version>
                <configuration>
                    <source>17</source>
                    <target>17</target>
                </configuration>
            </plugin>
        </plugins>
    </build>
</project>
4. Creating the JPA Entity Class (Persistent Class)
Let's create a Student persistent class that is mapped to a database "student" table.
A simple, persistent class should follow some rules:
- A no-arg constructor: It is recommended to have a default constructor with at least package visibility so that Hibernate can create the instance of the Persistent class by
newInstance()method. - Provide an identifier property: It is better to assign an attribute as an
id. This attribute behaves as a primary key in a database. - Declare getter and setter methods: Hibernate recognizes the method by getter and setter method names by default.
- Prefer non-final class: Hibernate uses the concept of proxies, that depend on the persistent class. The application programmer will not be able to use proxies for lazy association fetching.
Create a Student entity class under net.javaguides.hibernate.entity package as follows:
package net.javaguides.hibernate.entity;

import jakarta.persistence.*;

@Entity
@Table(name = "student")
public class Student {

    @Id
    @GeneratedValue(strategy = GenerationType.IDENTITY)
    @Column(name = "id")
    private int id;

    @Column(name = "first_name")
    private String firstName;

    @Column(name = "last_name")
    private String lastName;

    @Column(name = "email")
    private String email;

    public Student() {
    }

    public Student(String firstName, String lastName, String email) {
        this.firstName = firstName;
        this.lastName = lastName;
        this.email = email;
    }

    public int getId() {
        return id;
    }

    public void setId(int id) {
        this.id = id;
    }

    public String getFirstName() {
        return firstName;
    }

    public void setFirstName(String firstName) {
        this.firstName = firstName;
    }

    public String getLastName() {
        return lastName;
    }

    public void setLastName(String lastName) {
        this.lastName = lastName;
    }

    public String getEmail() {
        return email;
    }

    public void setEmail(String email) {
        this.email = email;
    }

    @Override
    public String toString() {
        return "Student [id=" + id + ", firstName=" + firstName + ", lastName=" + lastName + ", email=" + email + "]";
    }
}
JPA annotations used in the Student entity:
@Entity- Specifies that the class is an entity.@Table- Specifies the table in the database with which this entity is mapped.@Column- Specifies the mapping between a basic entity attribute and the database table column.@Id- Specifies the primary key of the entity.@GeneratedValue- Specifies the generation strategies for the values of primary keys.
5. Create a Hibernate Configuration File - hibernate.cfg.xml
Before creating the Hibernate configuration file, ensure you create a hibernate_db database in the MySQL server.
Create an XML file named hibernate.cfg.xml under the resources folder and write the following code:
<!DOCTYPE hibernate-configuration PUBLIC
        "-//Hibernate/Hibernate Configuration DTD 3.0//EN"
        "http://www.hibernate.org/dtd/hibernate-configuration-3.0.dtd">
<hibernate-configuration>
    <session-factory>
        <!-- JDBC Database connection settings -->
        <property name="connection.driver_class">com.mysql.cj.jdbc.Driver</property>
        <property name="connection.url">jdbc:mysql://localhost:3306/hibernate_db?useSSL=false</property>
        <property name="connection.username">root</property>
        <property name="connection.password">root</property>
        <!-- JDBC connection pool settings ... using built-in test pool -->
        <property name="connection.pool_size">1</property>
        <!-- Echo the SQL to stdout -->
        <property name="show_sql">true</property>
        <!-- Set the current session context -->
        <property name="current_session_context_class">thread</property>
        <!-- Drop and re-create the database schema on startup -->
        <

property name="hbm2ddl.auto">create-drop</property>
        <!-- dbcp connection pool configuration -->
        <property name="hibernate.dbcp.initialSize">5</property>
        <property name="hibernate.dbcp.maxTotal">20</property>
        <property name="hibernate.dbcp.maxIdle">10</property>
        <property name="hibernate.dbcp.minIdle">5</property>
        <property name="hibernate.dbcp.maxWaitMillis">-1</property>
        <mapping class="net.javaguides.hibernate.entity.Student"/>
    </session-factory>
</hibernate-configuration>
In Hibernate 6, we don't have to specify the dialect because Hibernate 6 will automatically configure it based on the database JDBC driver that we add to the classpath.
6. Create a Hibernate Utility Class
Next, let's create a helper class to bootstrap the Hibernate SessionFactory. In most Hibernate applications, the SessionFactory should be instantiated once during application initialization. The single instance should then be used by all code in a particular process, and any Session should be created using this single SessionFactory. The SessionFactory is thread-safe and can be shared.
Create the HibernateUtil class with the following code to configure SessionFactory as a singleton and use it throughout the application:
package net.javaguides.hibernate.util;

import org.hibernate.SessionFactory;
import org.hibernate.boot.Metadata;
import org.hibernate.boot.MetadataSources;
import org.hibernate.boot.registry.StandardServiceRegistry;
import org.hibernate.boot.registry.StandardServiceRegistryBuilder;

public class HibernateUtil {
    private static StandardServiceRegistry registry;
    private static SessionFactory sessionFactory;

    public static SessionFactory getSessionFactory() {
        if (sessionFactory == null) {
            try {
                // Create registry
                registry = new StandardServiceRegistryBuilder().configure().build();

                // Create MetadataSources
                MetadataSources sources = new MetadataSources(registry);

                // Create Metadata
                Metadata metadata = sources.getMetadataBuilder().build();

                // Create SessionFactory
                sessionFactory = metadata.getSessionFactoryBuilder().build();

            } catch (Exception e) {
                e.printStackTrace();
                if (registry != null) {
                    StandardServiceRegistryBuilder.destroy(registry);
                }
            }
        }
        return sessionFactory;
    }

    public static void shutdown() {
        if (registry != null) {
            StandardServiceRegistryBuilder.destroy(registry);
        }
    }
}
7. Create the Main App Class and Run the Application
Here is the main App class used to connect to the MySQL database and persist the Student object in a database table:
package net.javaguides.hibernate;

import java.util.List;

import org.hibernate.Session;
import org.hibernate.Transaction;

import net.javaguides.hibernate.entity.Student;
import net.javaguides.hibernate.util.HibernateUtil;

public class App {
    public static void main(String[] args) {

        Student student = new Student("Ramesh", "Fadatare", "rameshfadatare@javaguides.com");
        Student student1 = new Student("John", "Cena", "john@javaguides.com");
        Transaction transaction = null;
        try (Session session = HibernateUtil.getSessionFactory().openSession()) {
            // start a transaction
            transaction = session.beginTransaction();
            // save the student objects
            session.persist(student);
            session.persist(student1);
            // commit transaction
            transaction.commit();
        } catch (Exception e) {
            if (transaction != null) {
                transaction.rollback();
            }
            e.printStackTrace();
        }

        try (Session session = HibernateUtil.getSessionFactory().openSession()) {
            List<Student> students = session.createQuery("from Student", Student.class).list();
            students.forEach(s -> System.out.println(s.getFirstName()));
        } catch (Exception e) {
            e.printStackTrace();
        }
    }
}
Note that we are using Session.persist() method to save the Student entity object into the database.
Output

GitHub Repository
The complete source code of this article is available on my GitHub Repository.
Conclusion
In this article, we’ve developed a step-by-step simple Hibernate example application. You can learn more about the Hibernate ORM Framework at the Hibernate Tutorial.
My Top and Bestseller Udemy Courses. The sale is going on with a 70 - 80% discount. The discount coupon has been added to each course below:

Build REST APIs with Spring Boot 4, Spring Security 7, and JWT
![[NEW] Learn Apache Maven with IntelliJ IDEA and Java 25](https://img-c.udemycdn.com/course/750x422/6852721_b512_2.jpg "[NEW] Learn Apache Maven with IntelliJ IDEA and Java 25")
[NEW] Learn Apache Maven with IntelliJ IDEA and Java 25

ChatGPT + Generative AI + Prompt Engineering for Beginners
")
Spring 7 and Spring Boot 4 for Beginners (Includes 8 Projects)
Available in Udemy for Business

Building Real-Time REST APIs with Spring Boot - Blog App
Available in Udemy for Business

Building Microservices with Spring Boot and Spring Cloud
Available in Udemy for Business

Java Full-Stack Developer Course with Spring Boot and React JS
Available in Udemy for Business

Build 5 Spring Boot Projects with Java: Line-by-Line Coding

Testing Spring Boot Application with JUnit and Mockito
Available in Udemy for Business

Spring Boot Thymeleaf Real-Time Web Application - Blog App
Available in Udemy for Business

Master Spring Data JPA with Hibernate
Available in Udemy for Business

Spring Boot + Apache Kafka Course - The Practical Guide
Available in Udemy for Business


")

Comments
Post a Comment
Leave Comment